Laser Cutter Adventures
From Intimidating to Attainable
In January of 2019, our school opened a beautiful new building, six floors high, housing students from PreK to 12th grade, all dedicated to STEAM-based learning. As the PreK-1 Tech and Design Coach, I was a part of bringing this building to reality. I remember helping my team dream up a list of machines, resources, and tools that we wanted so that we could create amazing new experiences for our students. Then the time came, the building was open, and several of those machines appeared. I was now faced with coming up with authentic ways to use them in early childhood…yikes!
One of those machines was the laser cutter. Not only had I never seen one before, but the sheer size of it made it seem somewhat intimidating. I began with the question I always ask when I think about whether or not a tool is appropriate for early childhood:
How accessible is it to my young learners? How much independence can I give them and how much support will they need?
If the tool involved a heavy hand in teachers doing work FOR the students, it became much less attractive. If I could have students do most of the planning and digital design, then it became more interesting to me. In this particular case, I learned that students could hand draw a design, produce it in a simple drawing tool like Seesaw, and then convert it into something the laser cutter would be able to understand. Ding ding ding! We have a winner!
Icons in Action
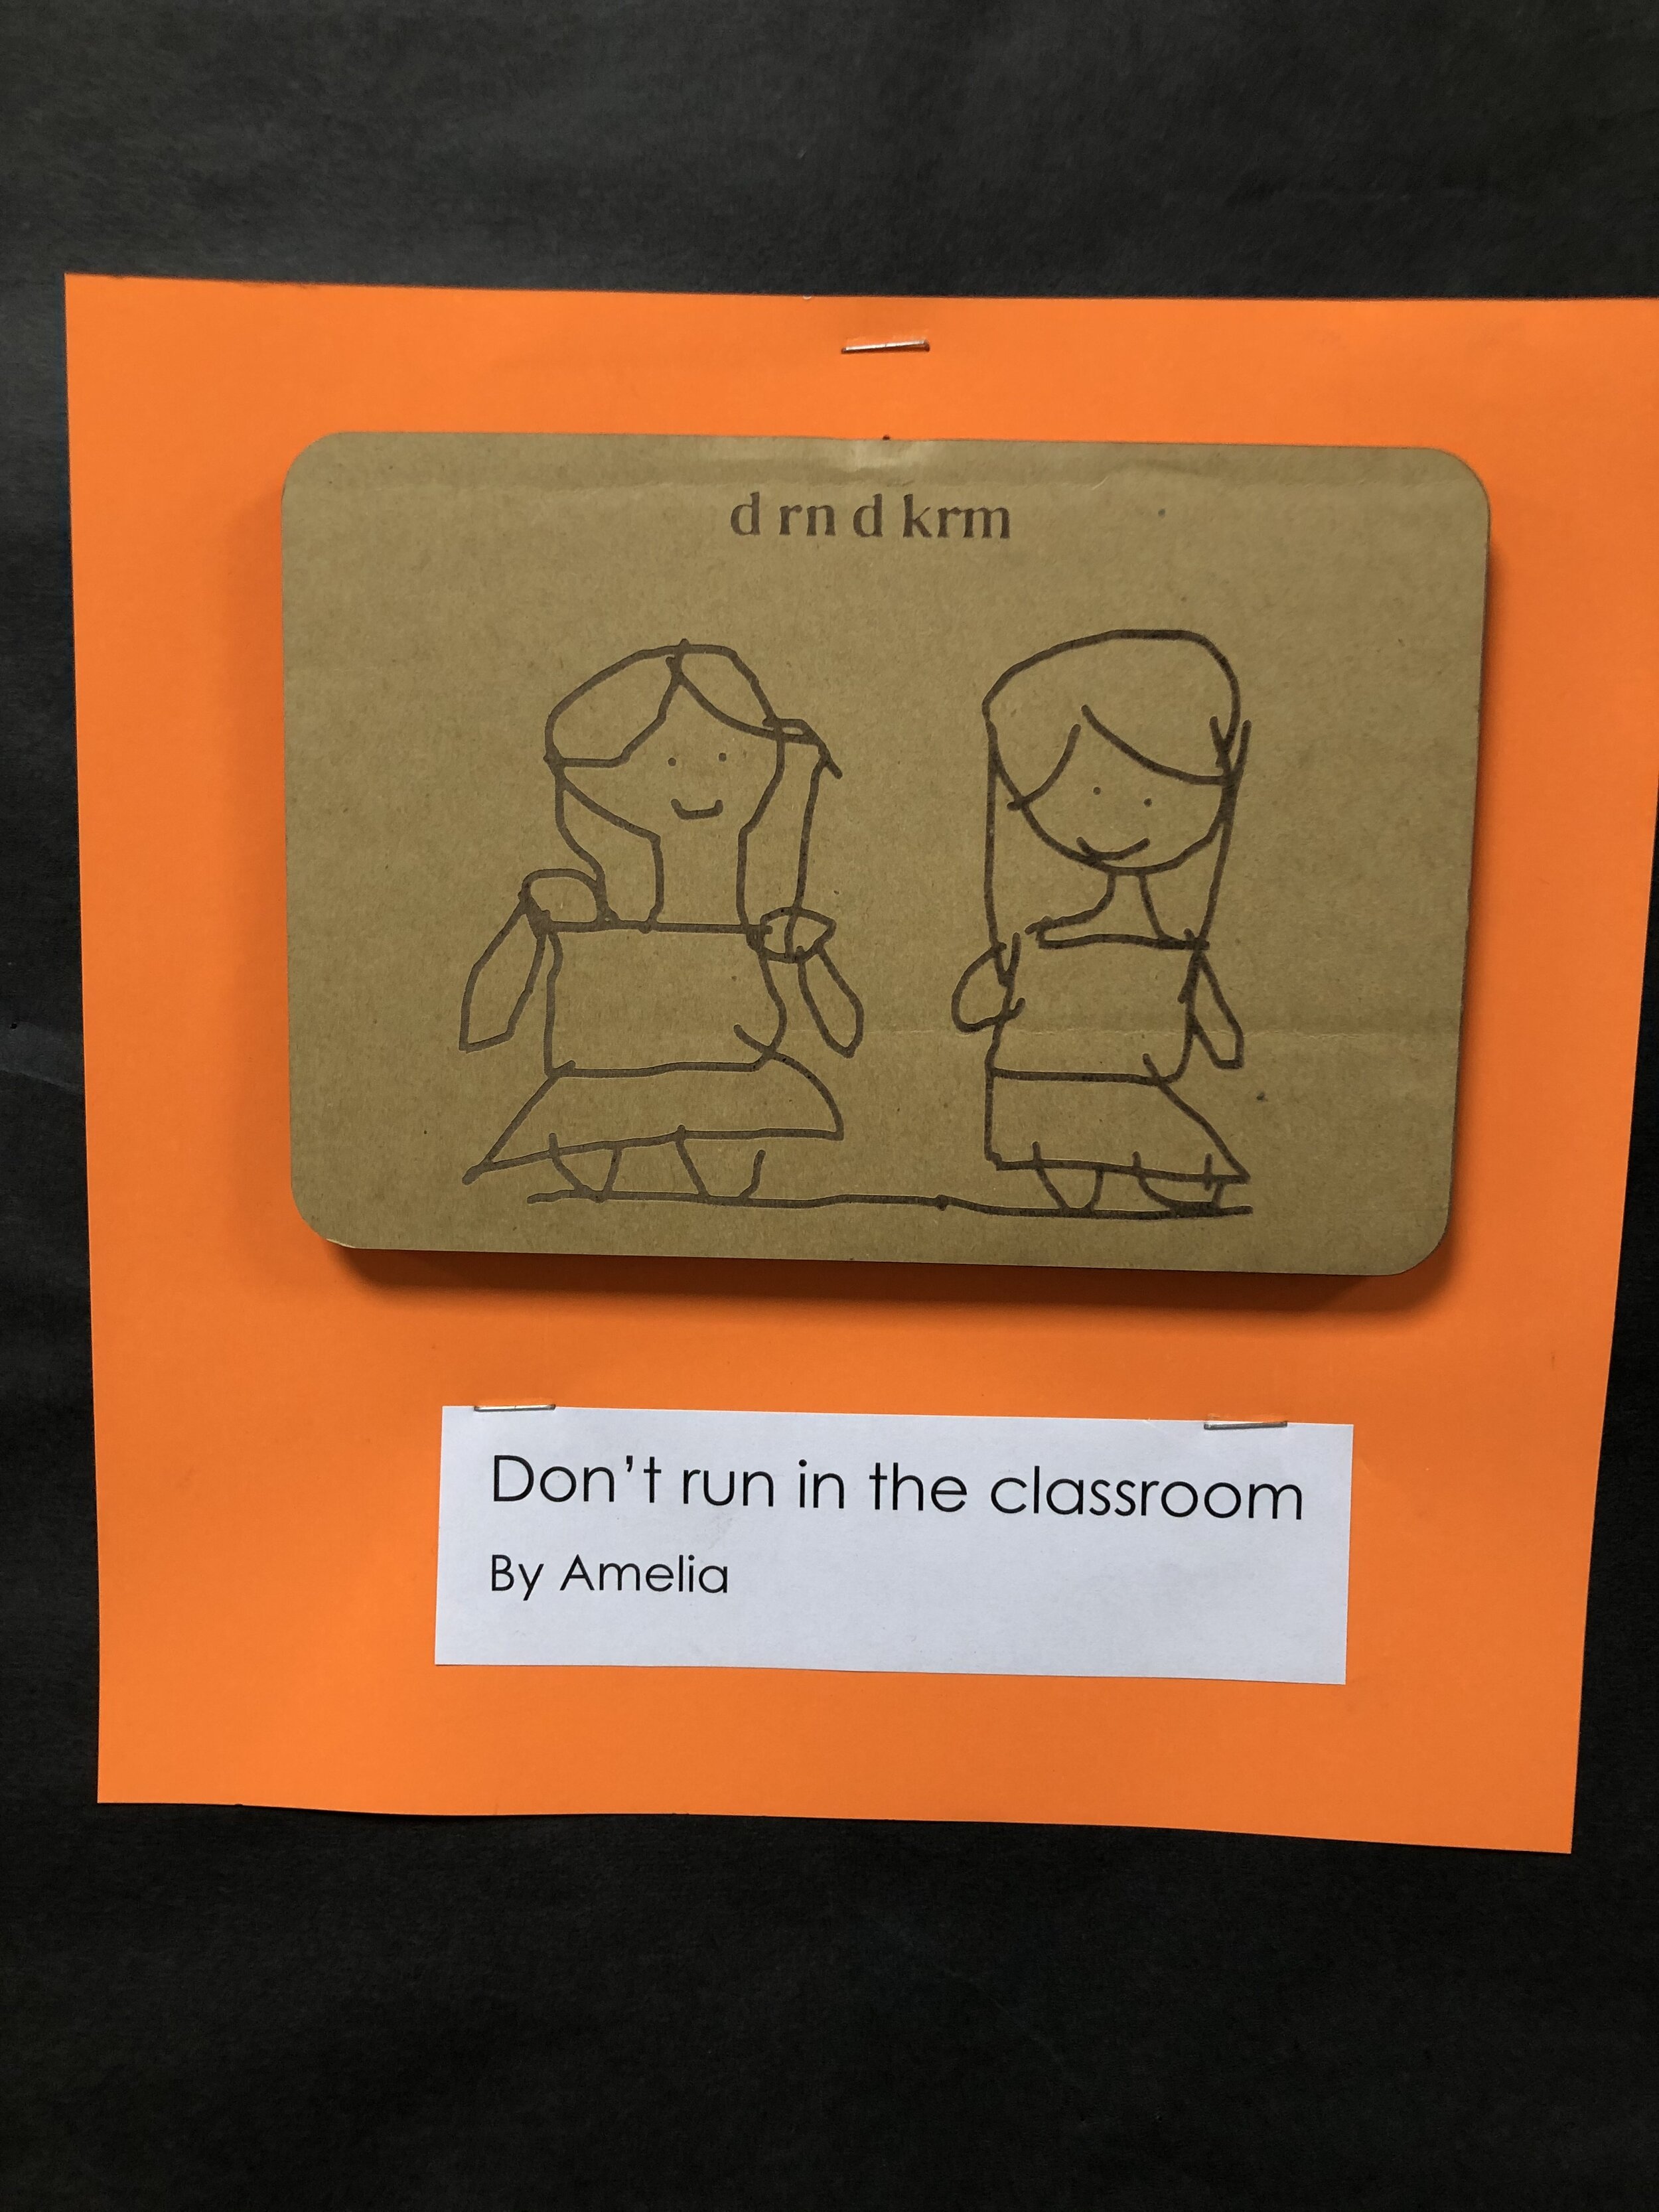
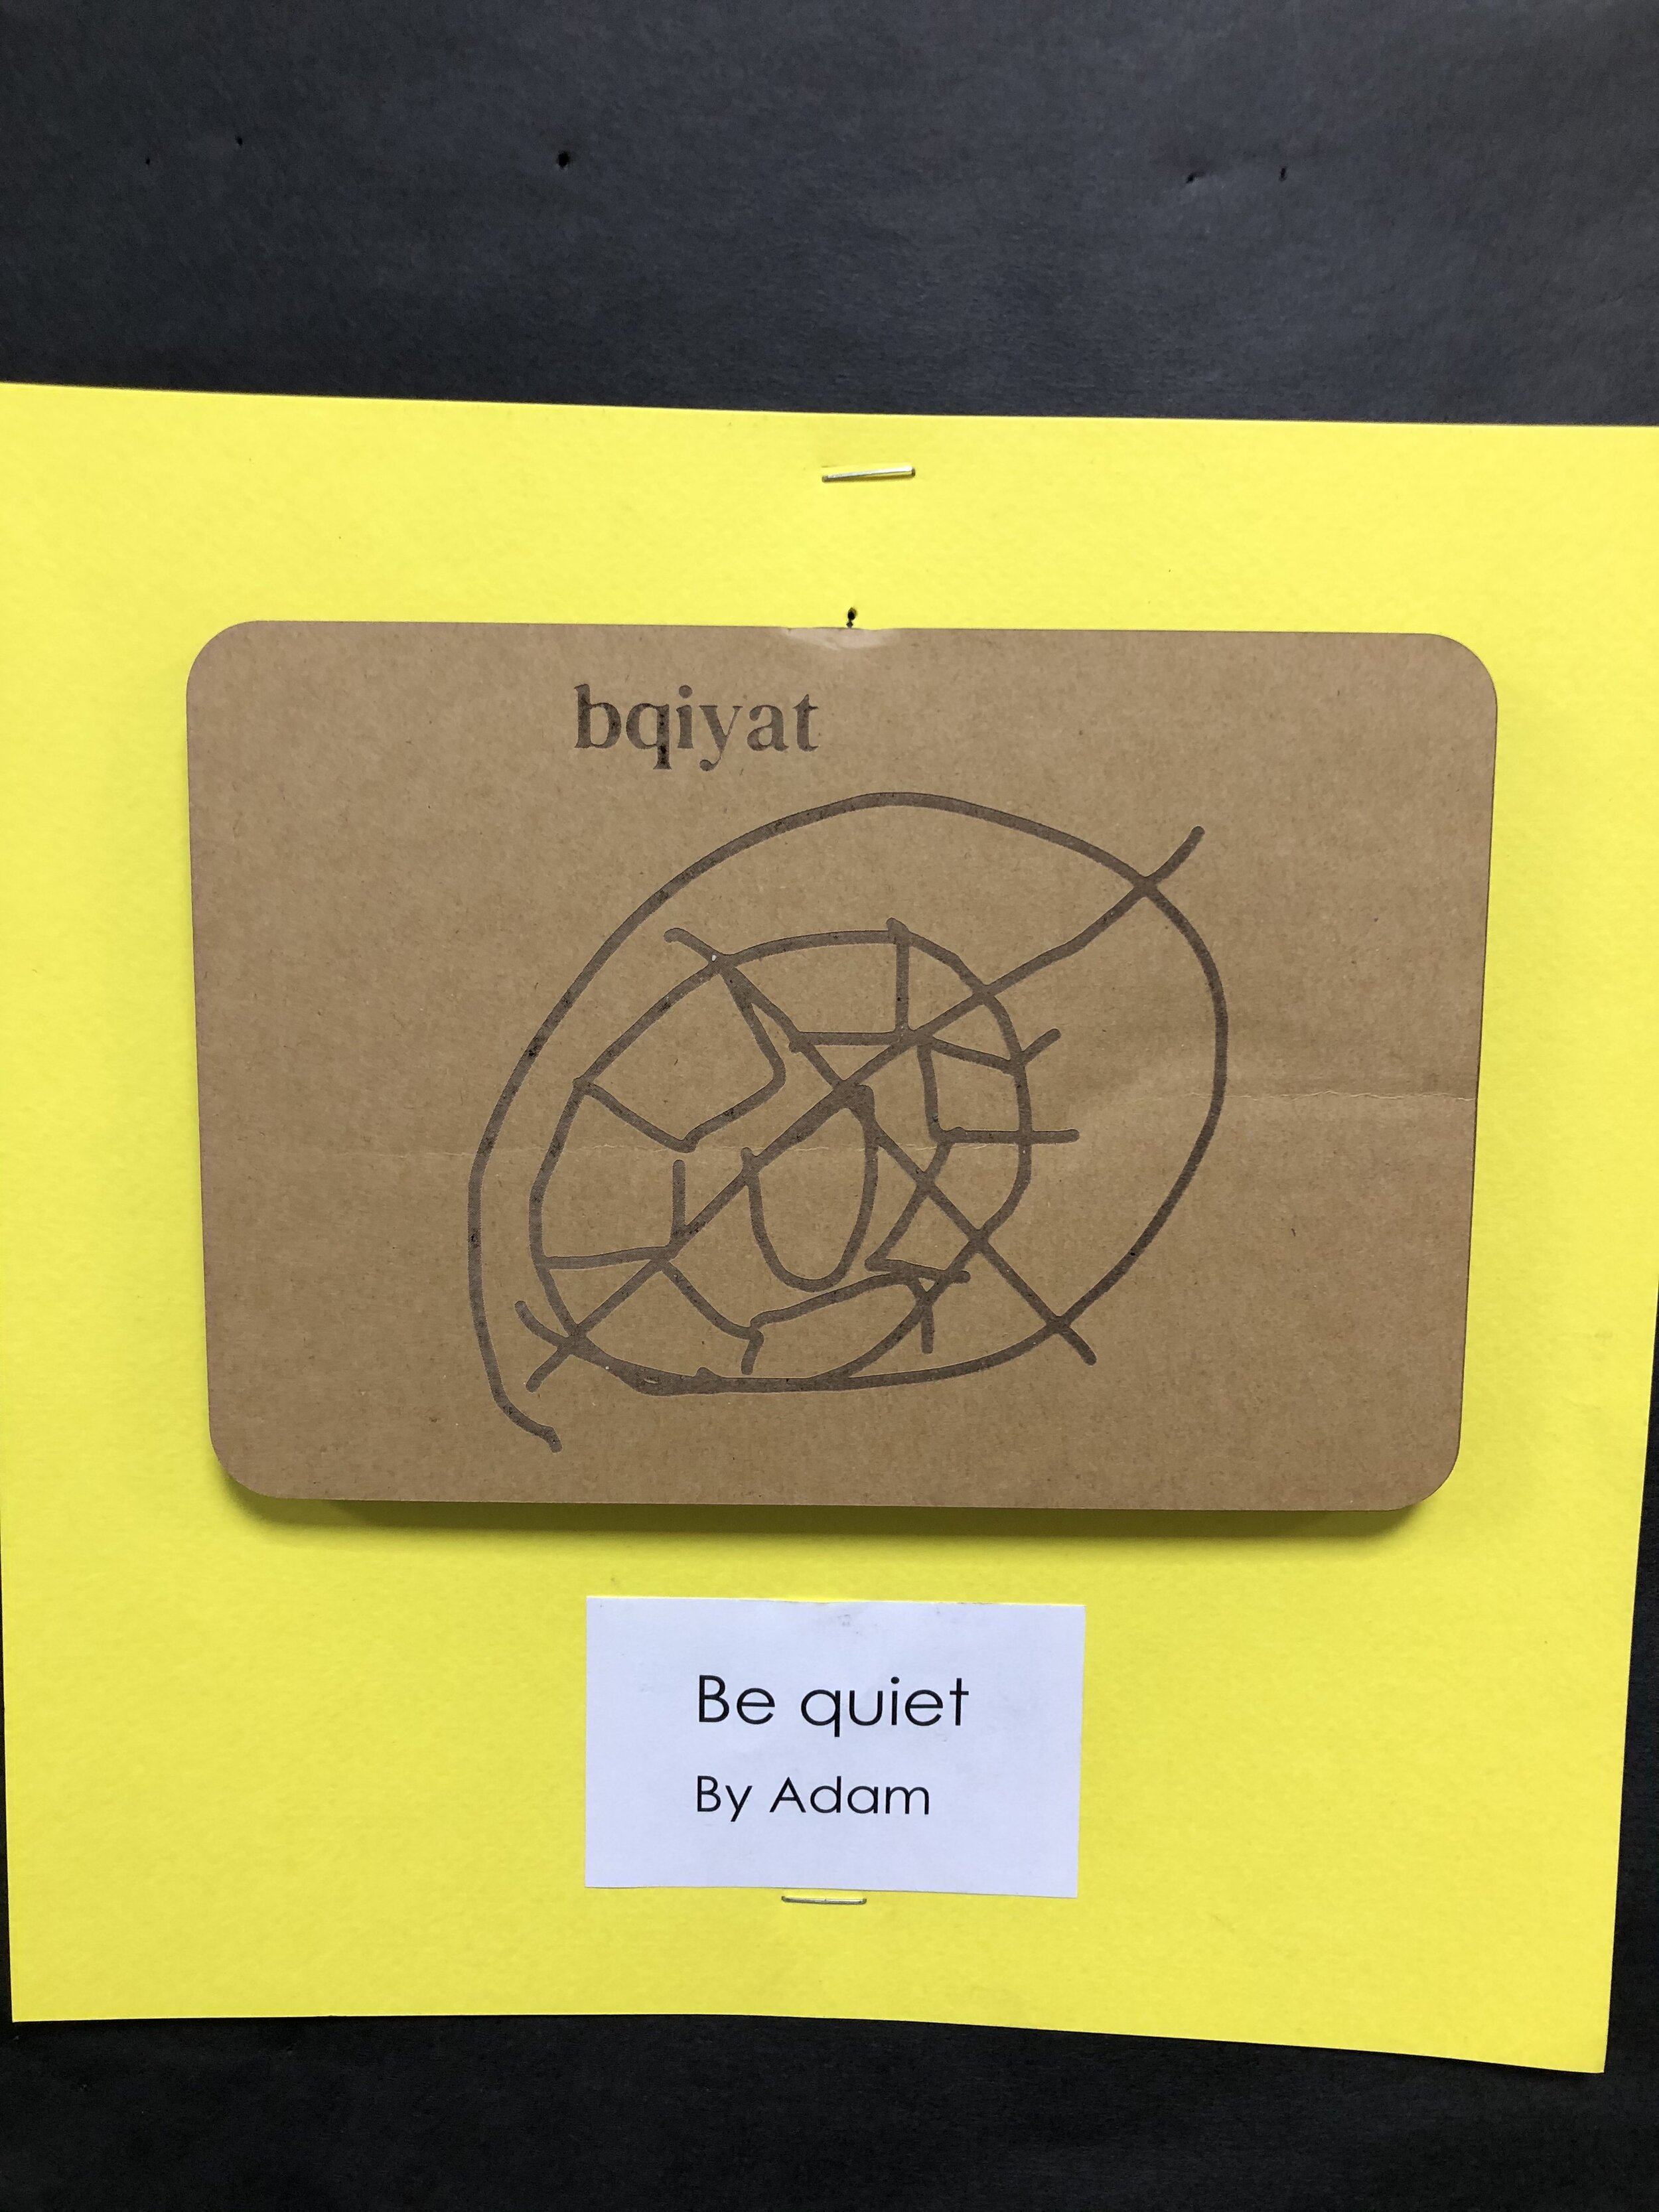
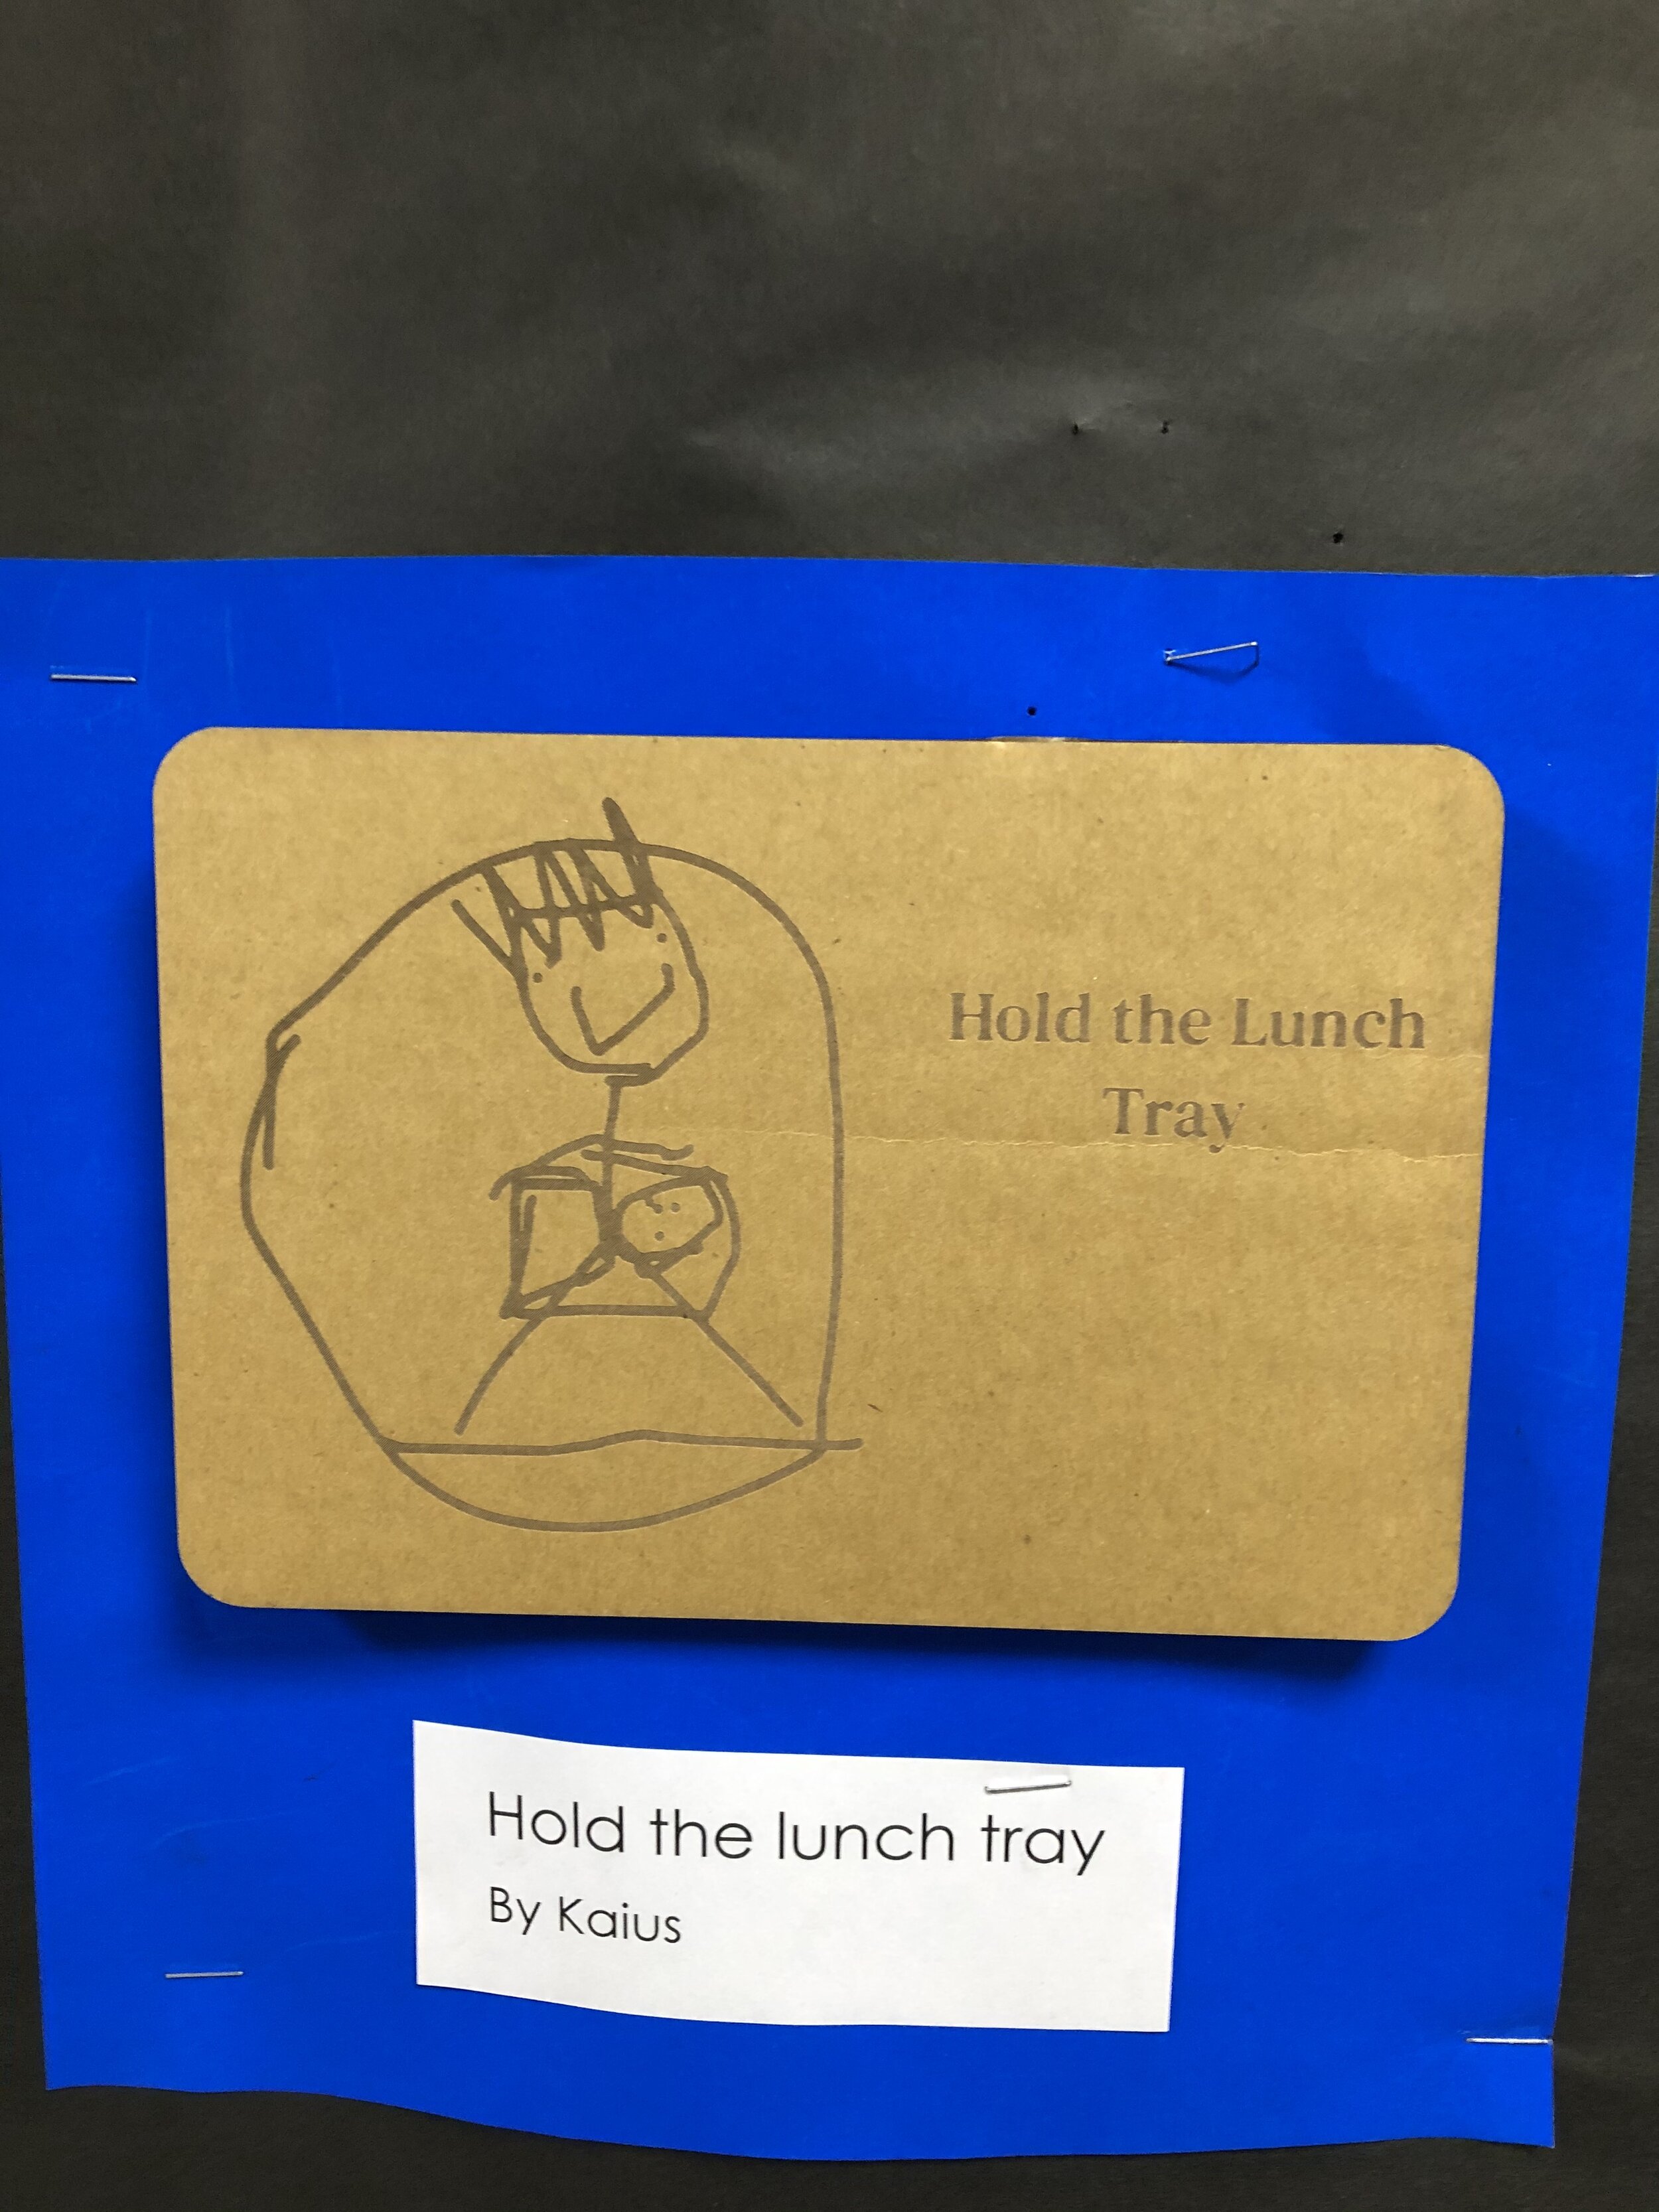
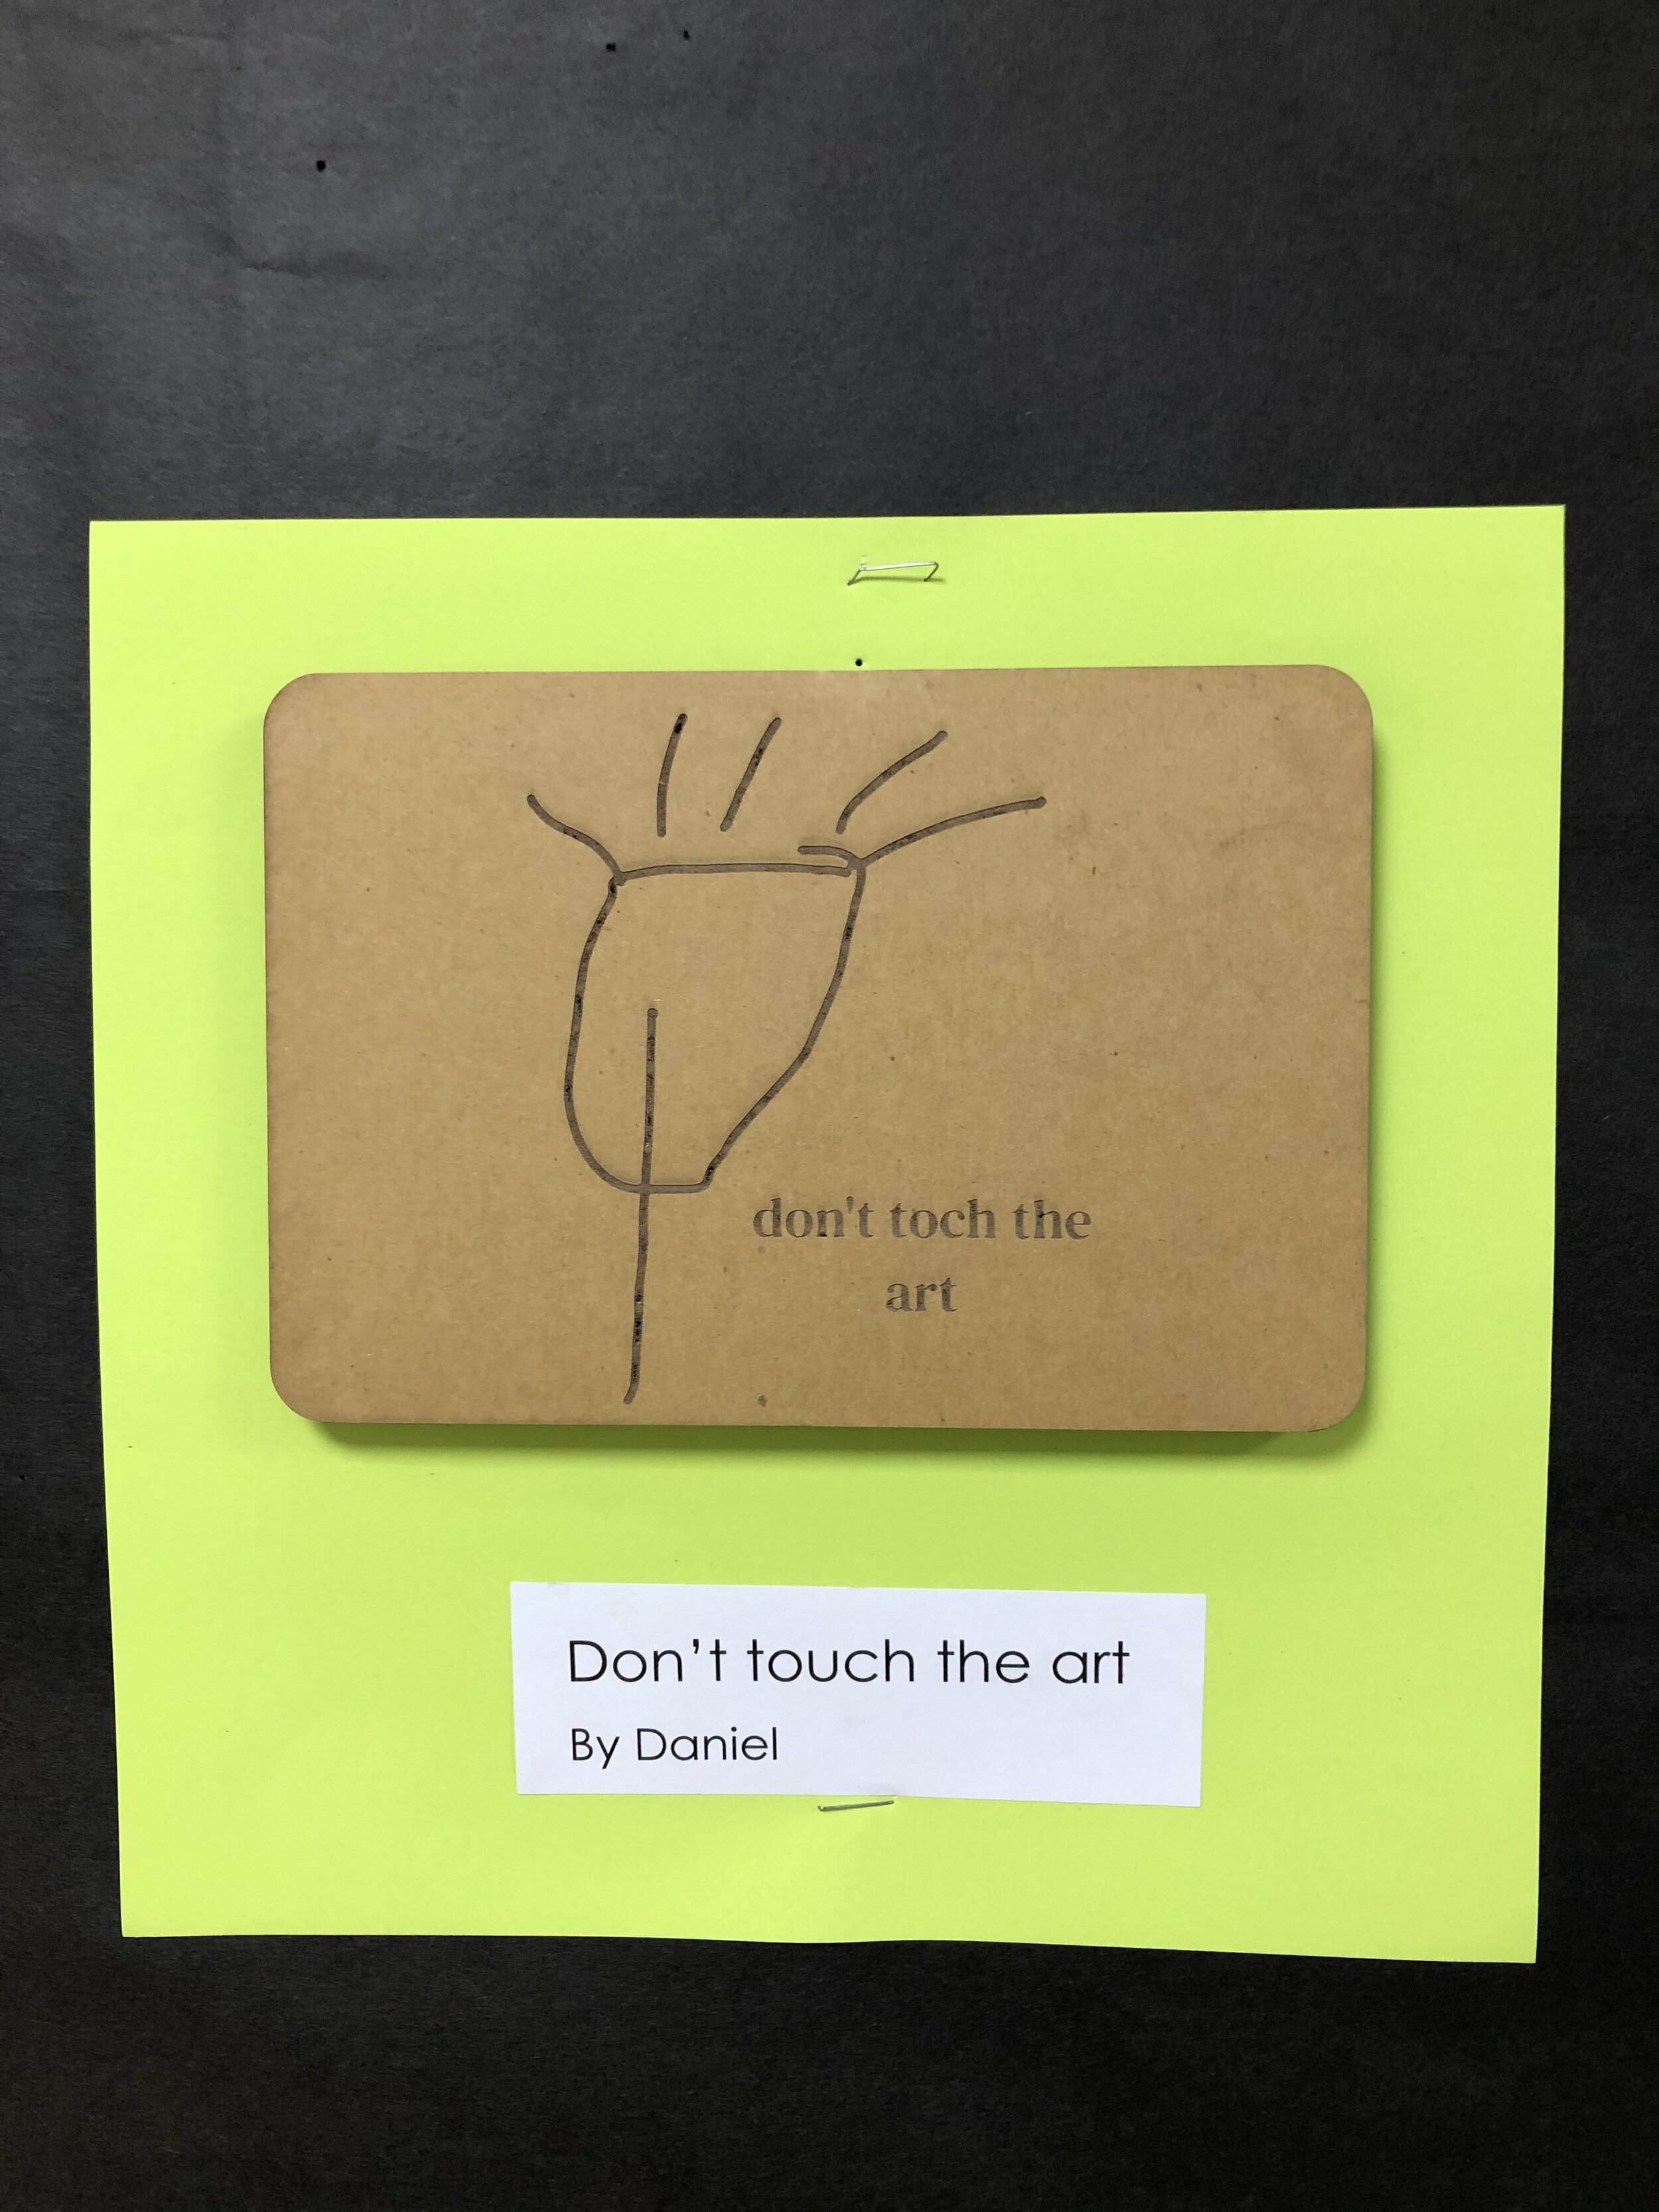
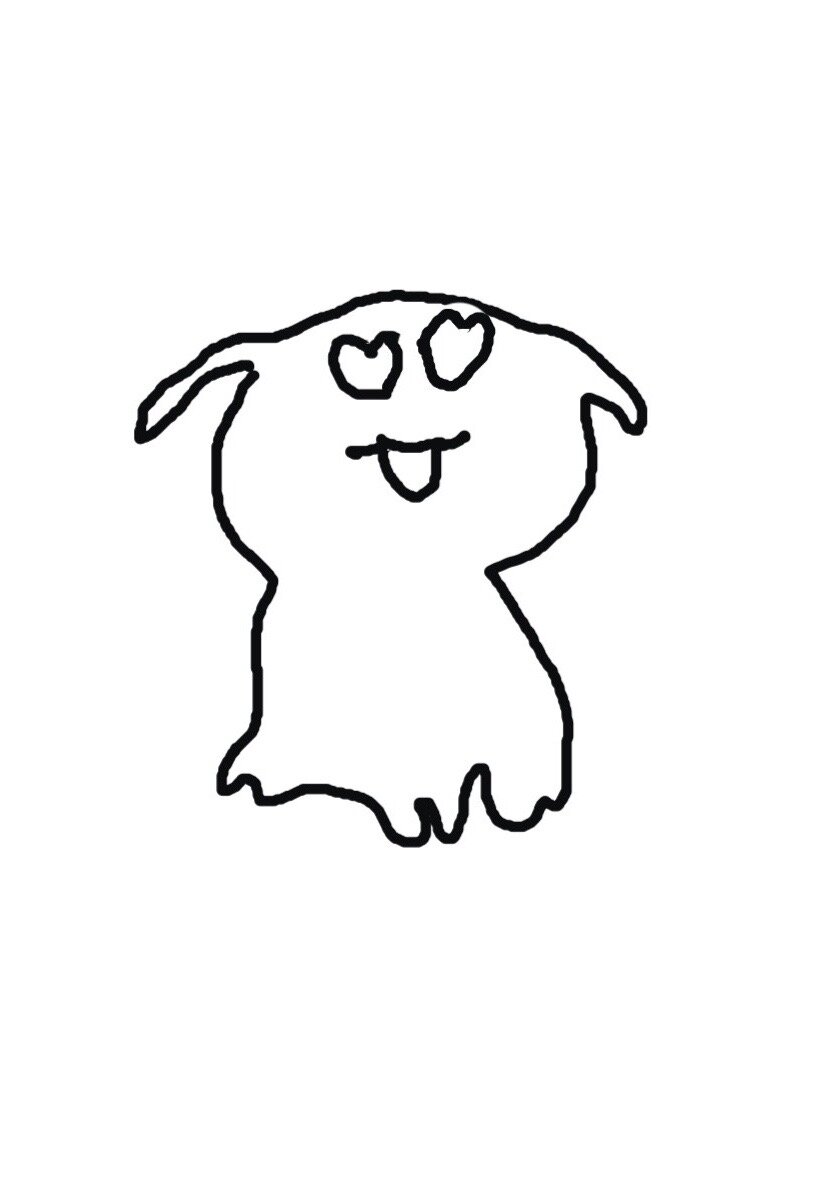
If you have been following my work, you’ll know I have a little bit of an obsession with icons and icon literacy. In Kindergarten, I spend a series of lessons helping the students learn how to read icons to attain more fluency when navigating unfamiliar digital tools. All of these lessons culminate in the students working on designing an iPad app interface with at least four functions and matching icons. Although they had already designed icons for a digital space, we begin the study of icons with those in our physical environment. The first Social Studies unit in Kindergarten focuses on the rules around the school. It seemed that a great way to get students to apply their learning from this unit, as well as their understanding of icons from my class, was to design a sign for a rule somewhere in the school.
We began the class by brainstorming different places around the school that we visit. Each student had to choose one of those places and one rule that applied to that location. Next, I reminded the students of the three key features of icons:
A small picture
One or two colors
Gives you information
After a quick turn-and-talk, the students were sent off to plan their design using this template:

Once students had finished planning, they were ready to create their digital design. Since Seesaw is our school’s chosen platform for digital portfolios, that is where they designed their signs. Students used the typing tool to write out their rule. We thought it was important to illustrate true Kindergarten spelling, so we did not correct words the students wrote phonetically. Some students did notice the predictive text feature while typing and were able to read and select the words they were attempting to spell. The students use the marker tool to draw their icon. A few things we learned:
Use only one color
The color must be a dark one (avoid yellow or pink etc.)
Try to teach the students not to go over their lines multiple times (it’s an excellent way for materials to burn when being cut out, especially if you are using cardboard like we were!)
Shadows and Light
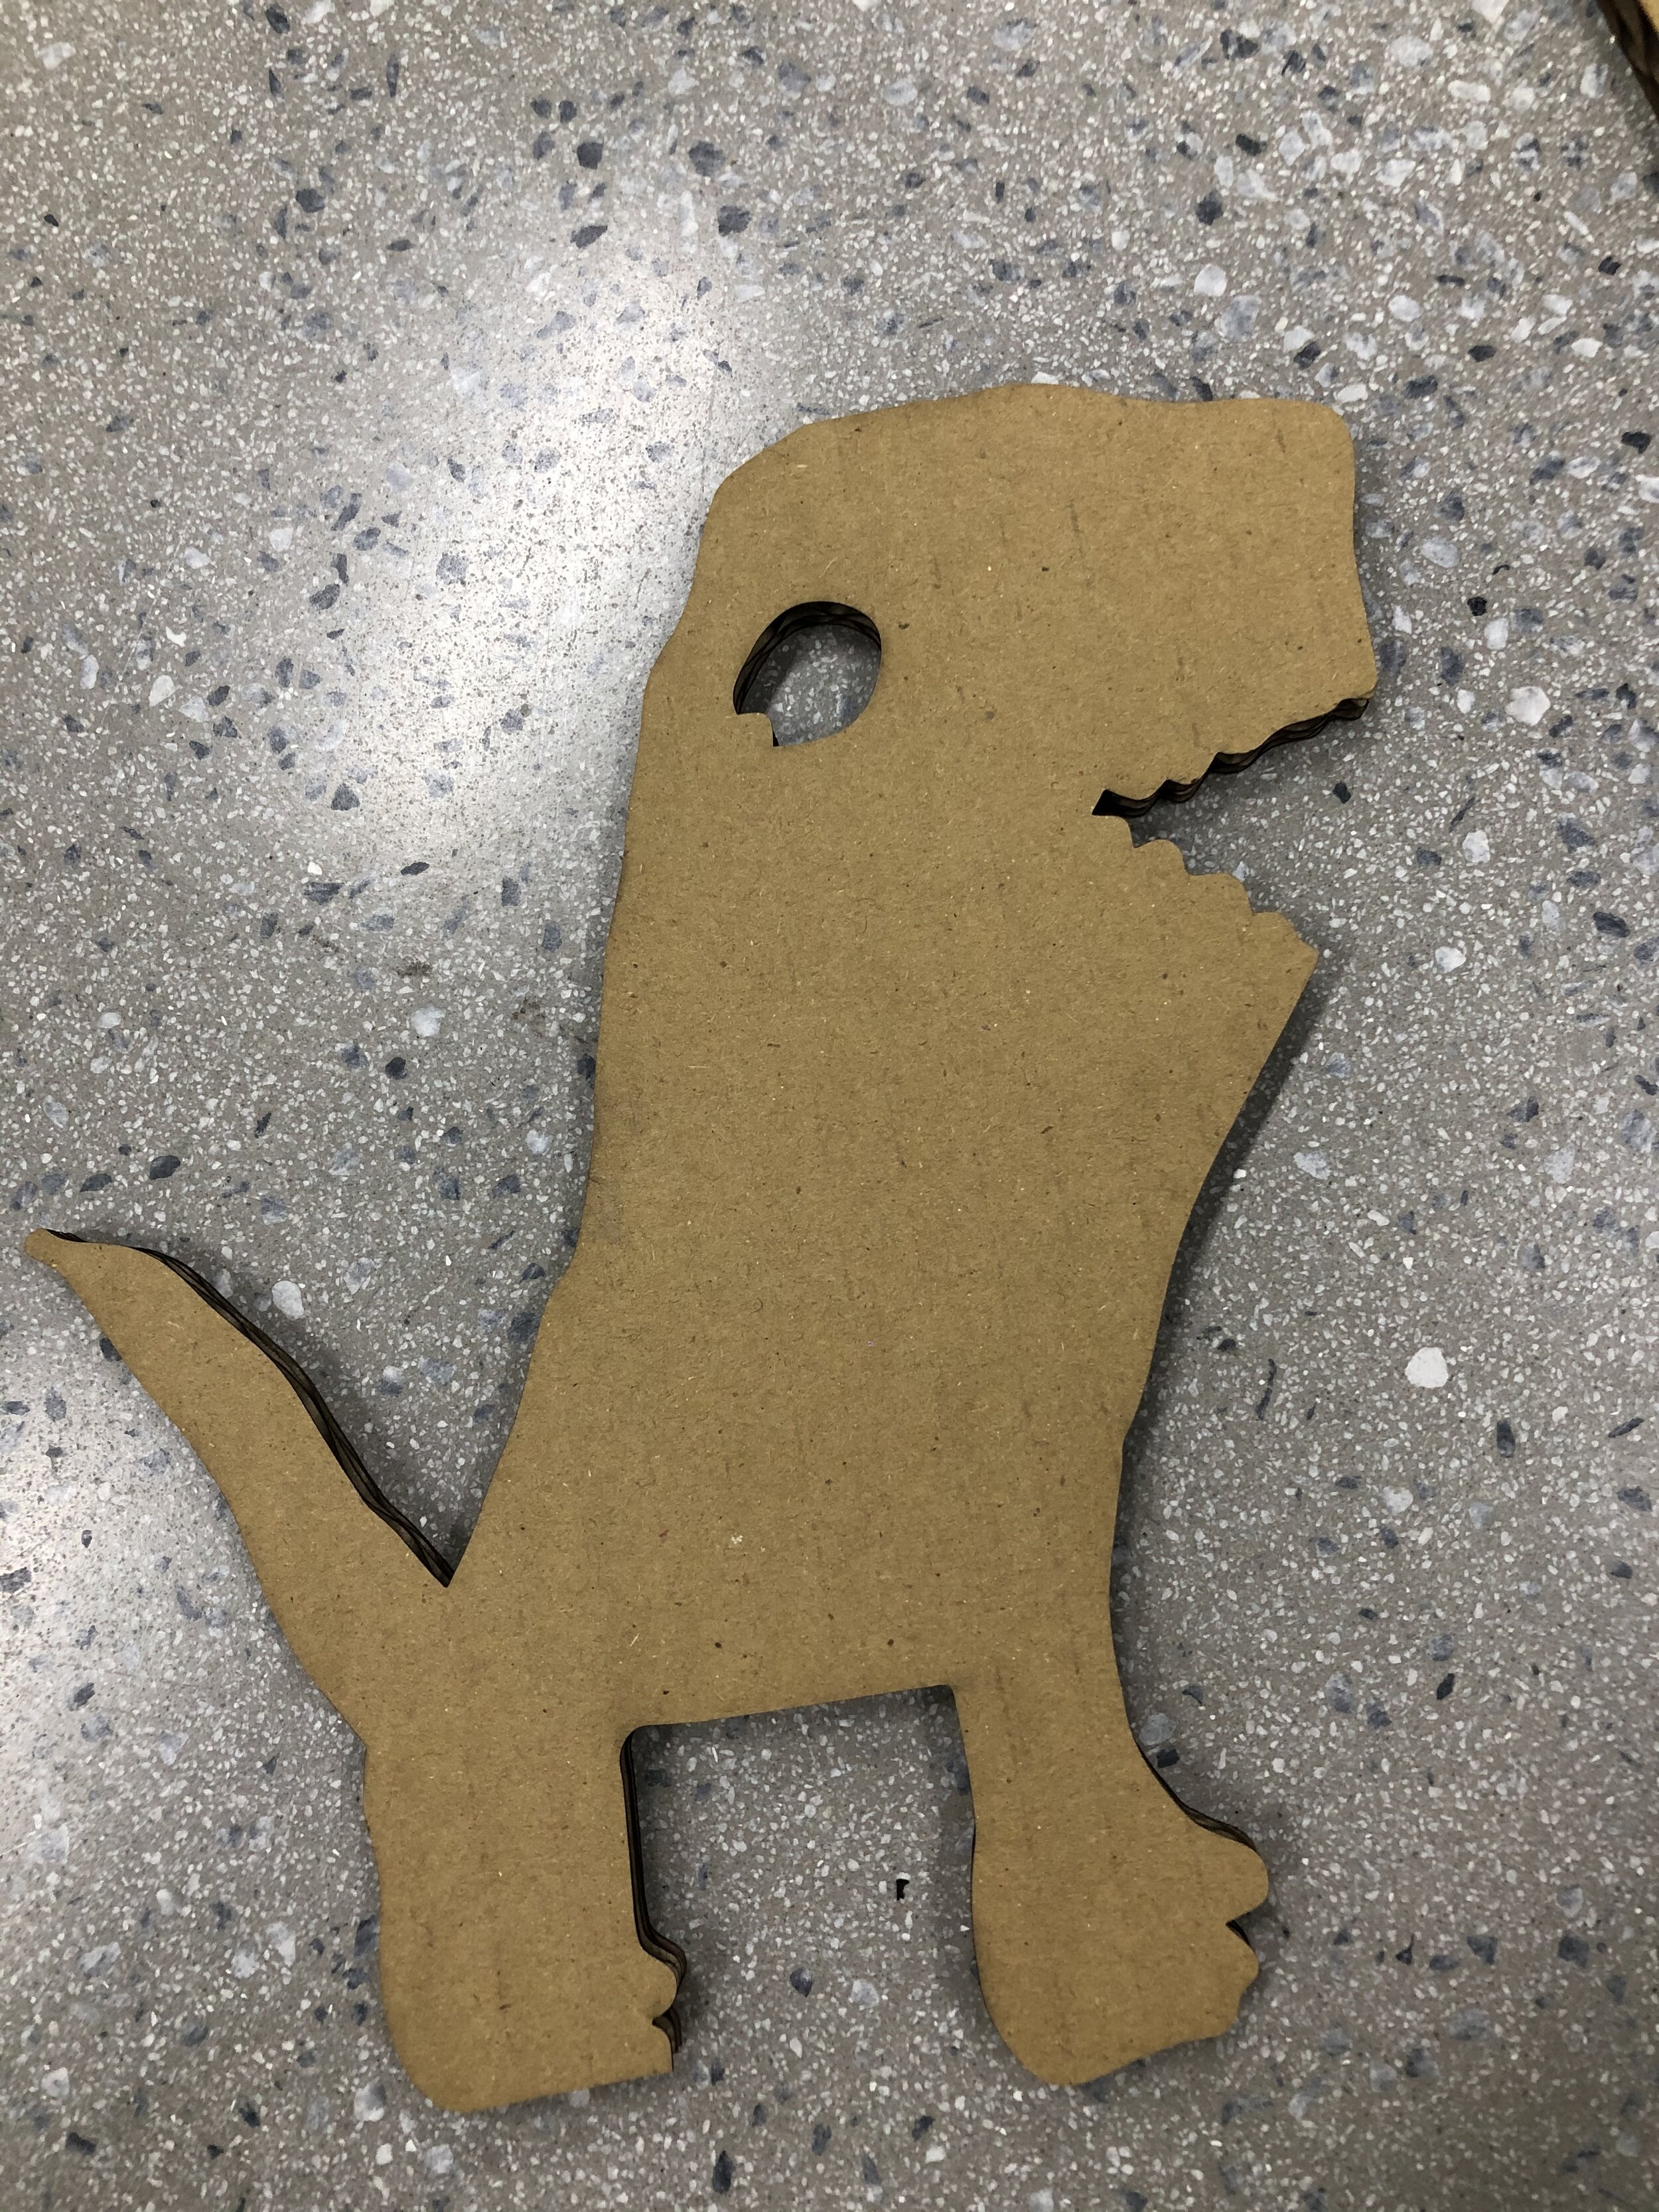
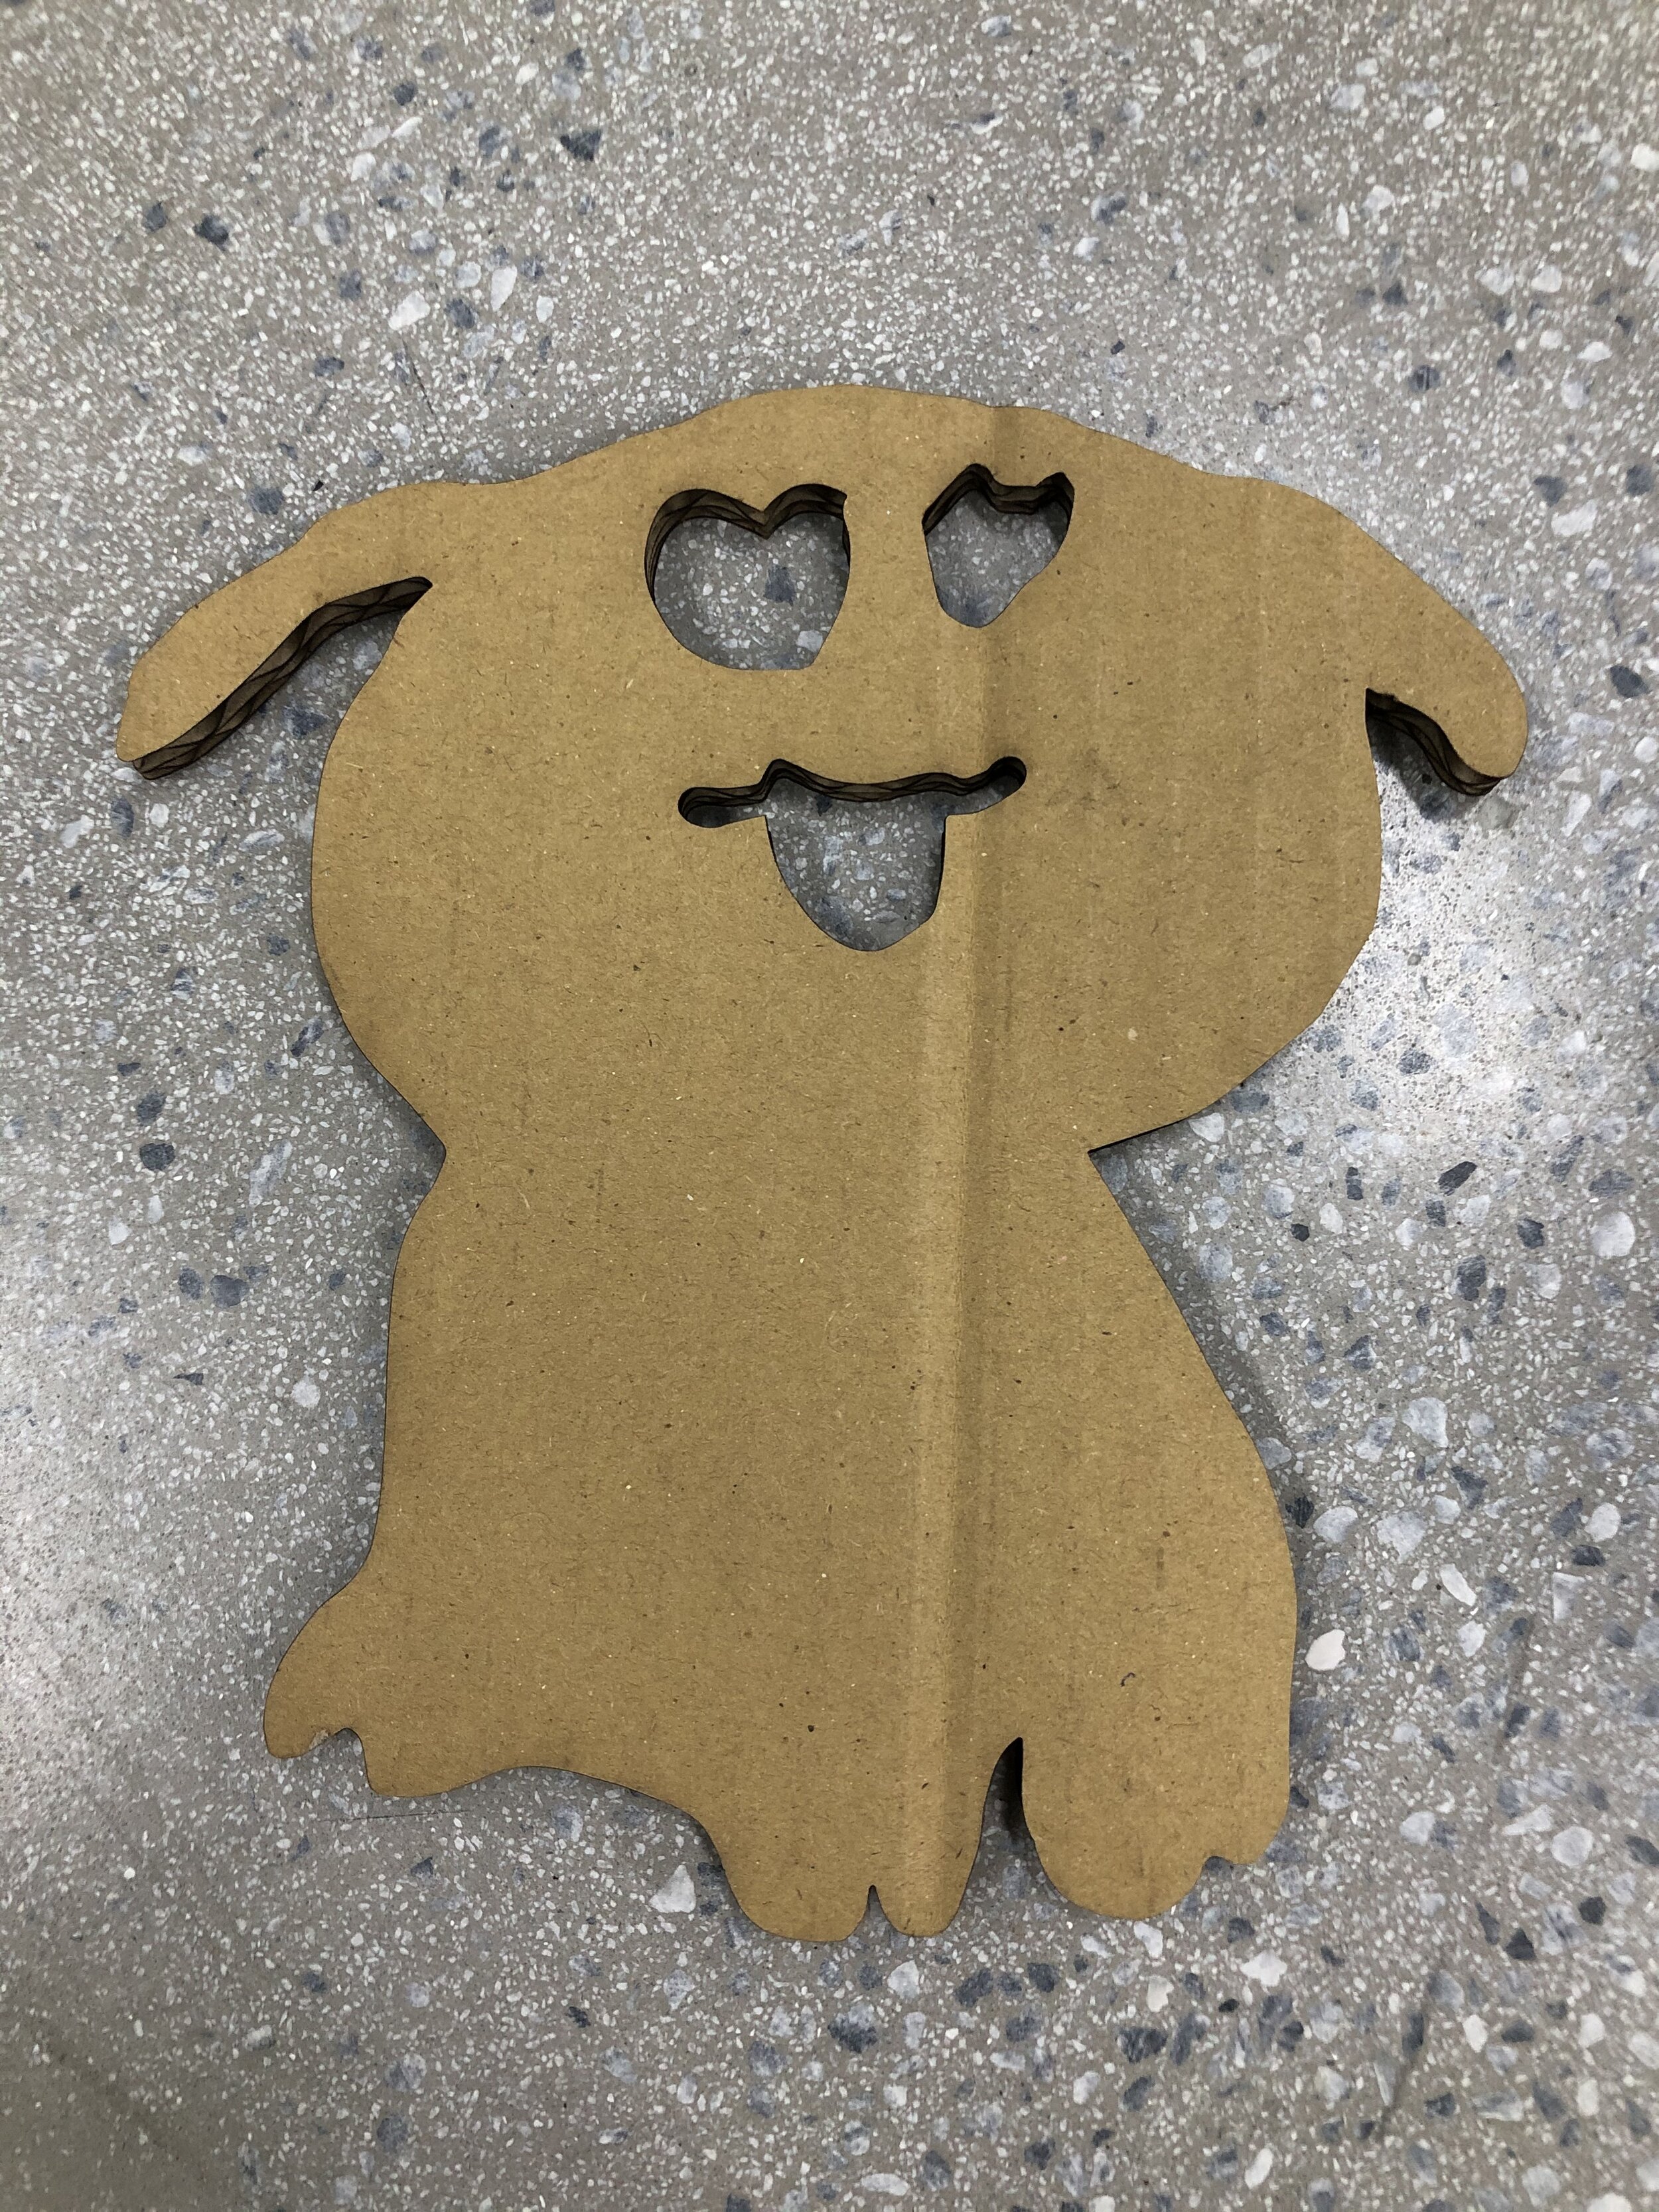
In First Grade, our science unit is on shadows and light, so I immediately thought of shadow puppets to help them think about and apply the process of blocking light in certain ways to create shapes.
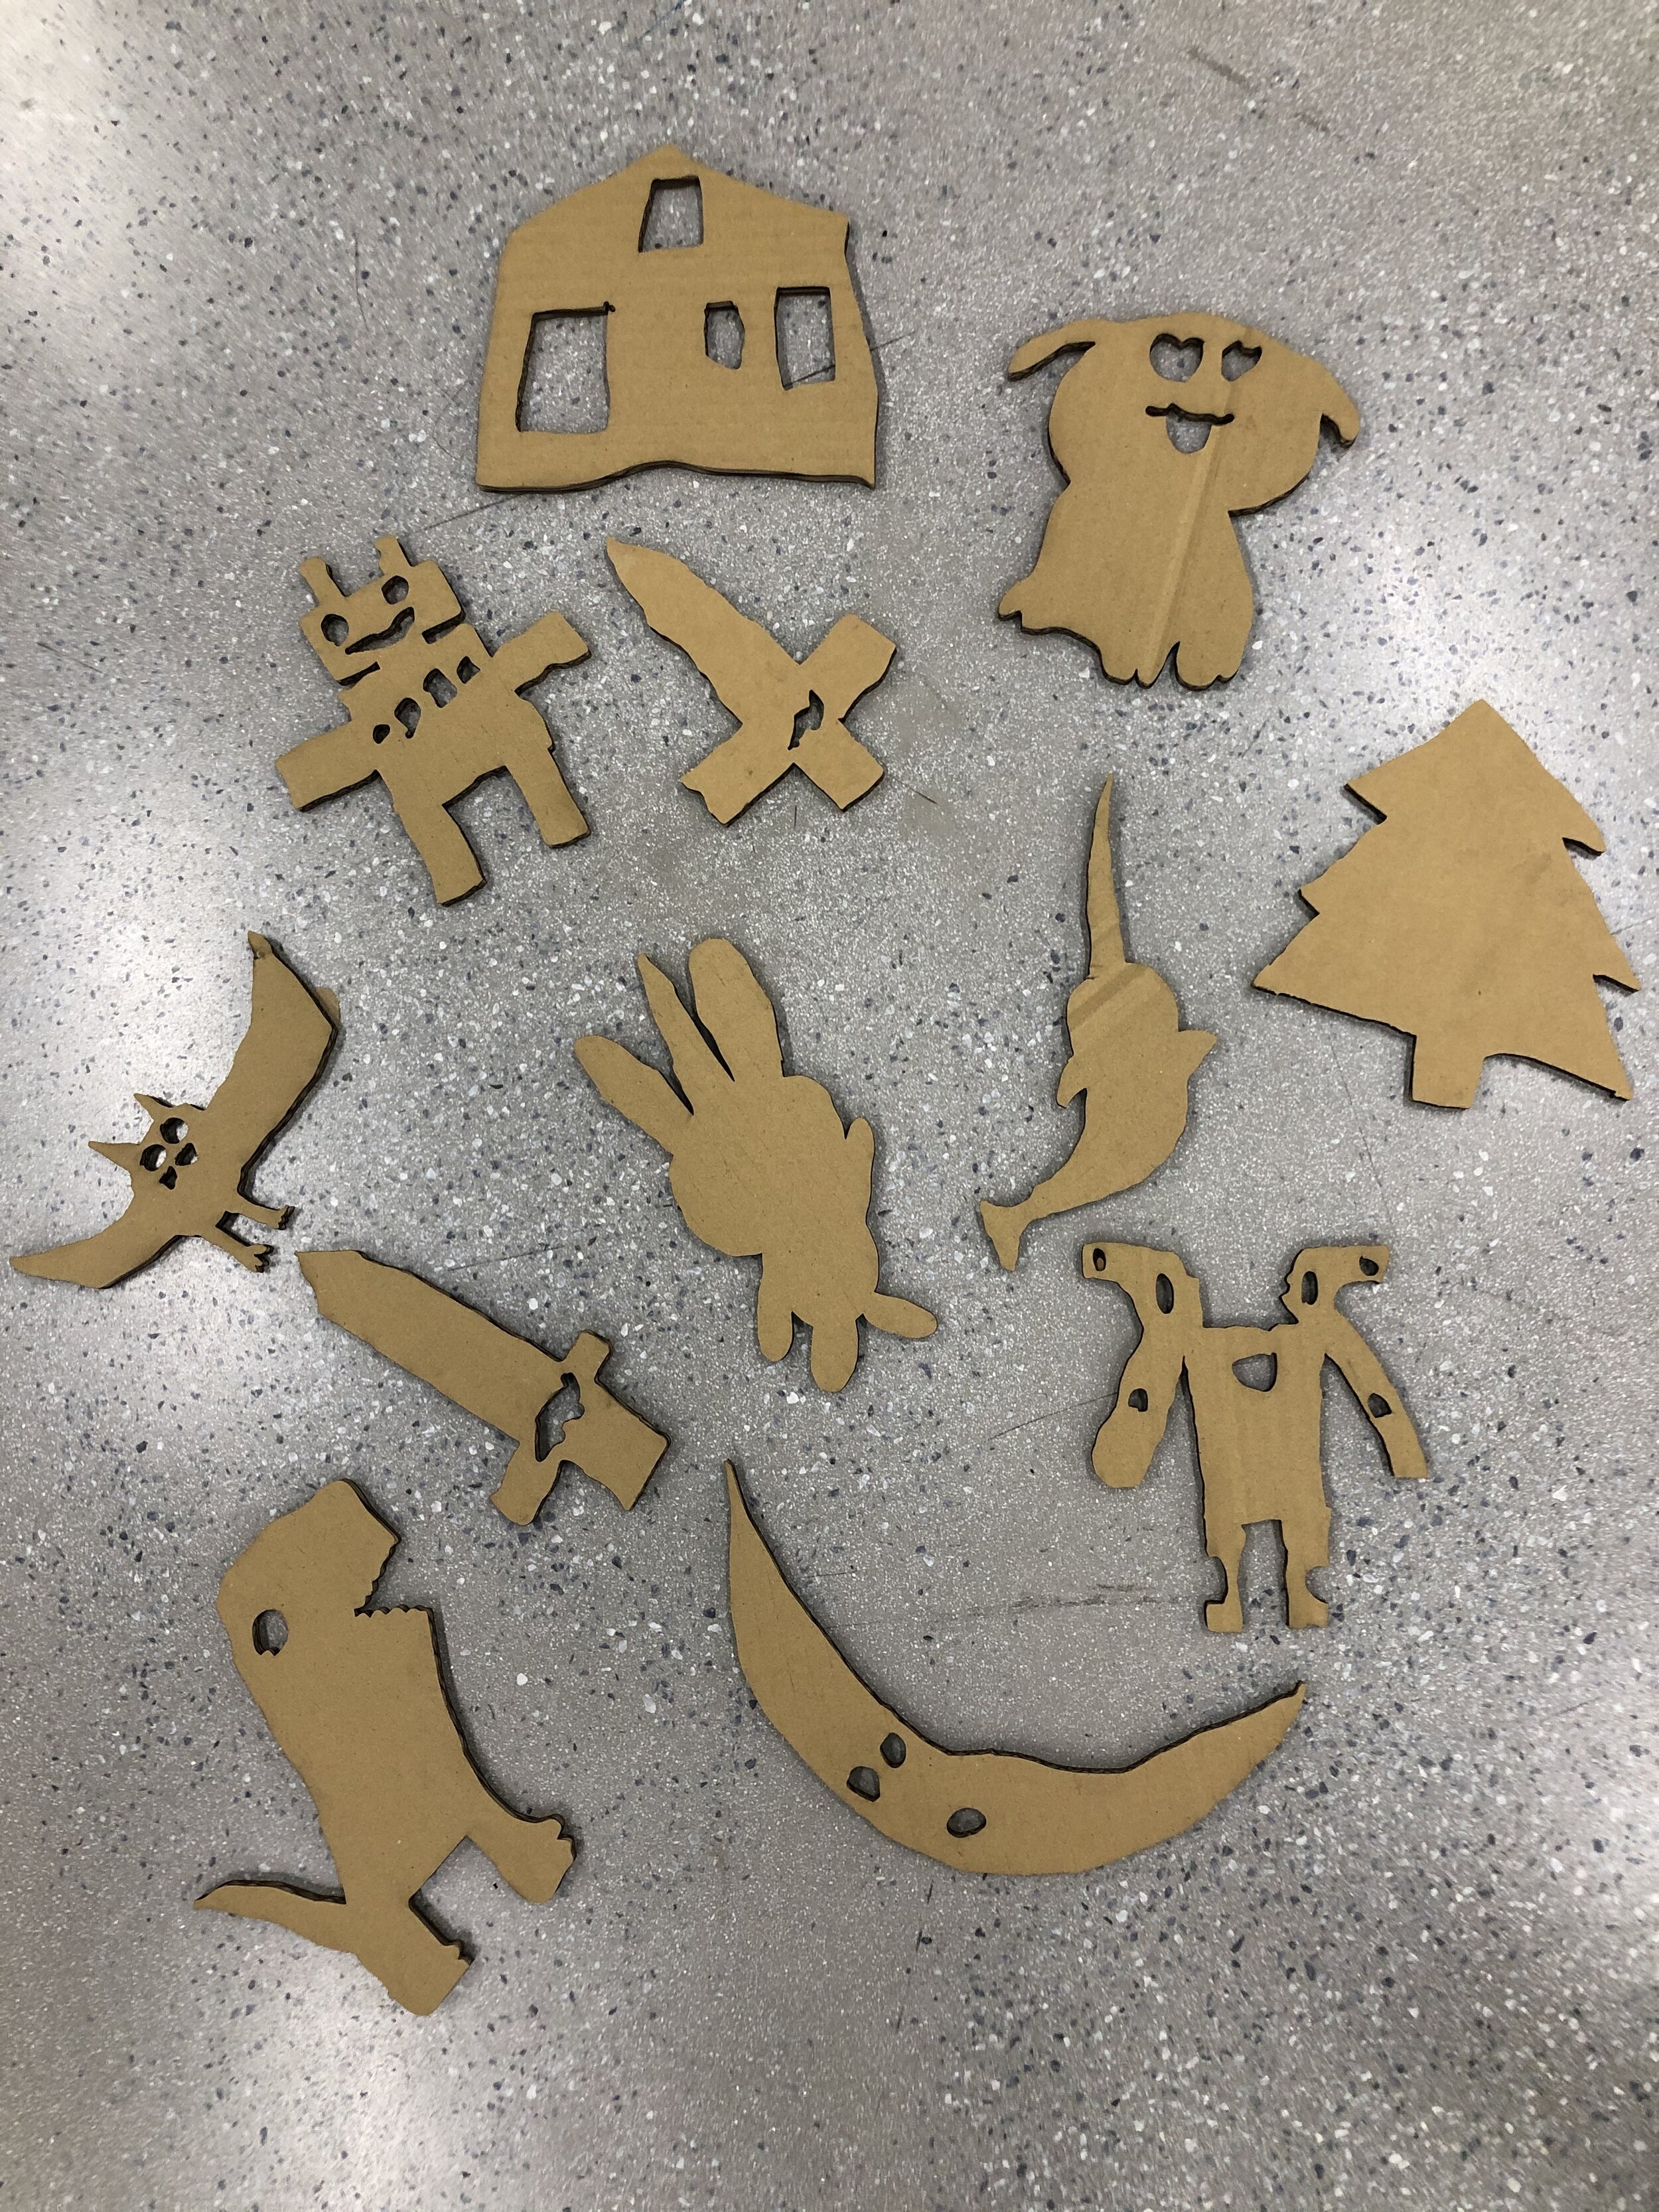
We began by prototyping using paper and scissors. I showed them a quick video of how our laser cutter worked and said that every line that they draw the laser cutter will cut. They had to simulate this process by first drawing their desired shape for their puppet, then become the laser cutter with a pair of scissors and start cutting along every line and dot they drew. For many, this helped immediately visualize their errors in design and they went straight to second and third iterations until they were happy. Once they were satisfied, they tested what it would look like against a curtain set up with a spot light.
Through this process students were prompted to think carefully about creating shapes by either blocking light or allowing light to pass through their puppet. They soon learned that holes within their puppet were good for details like eyes, but otherwise they needed to focus on not drawing too many lines or parts of their puppet would get cut off!
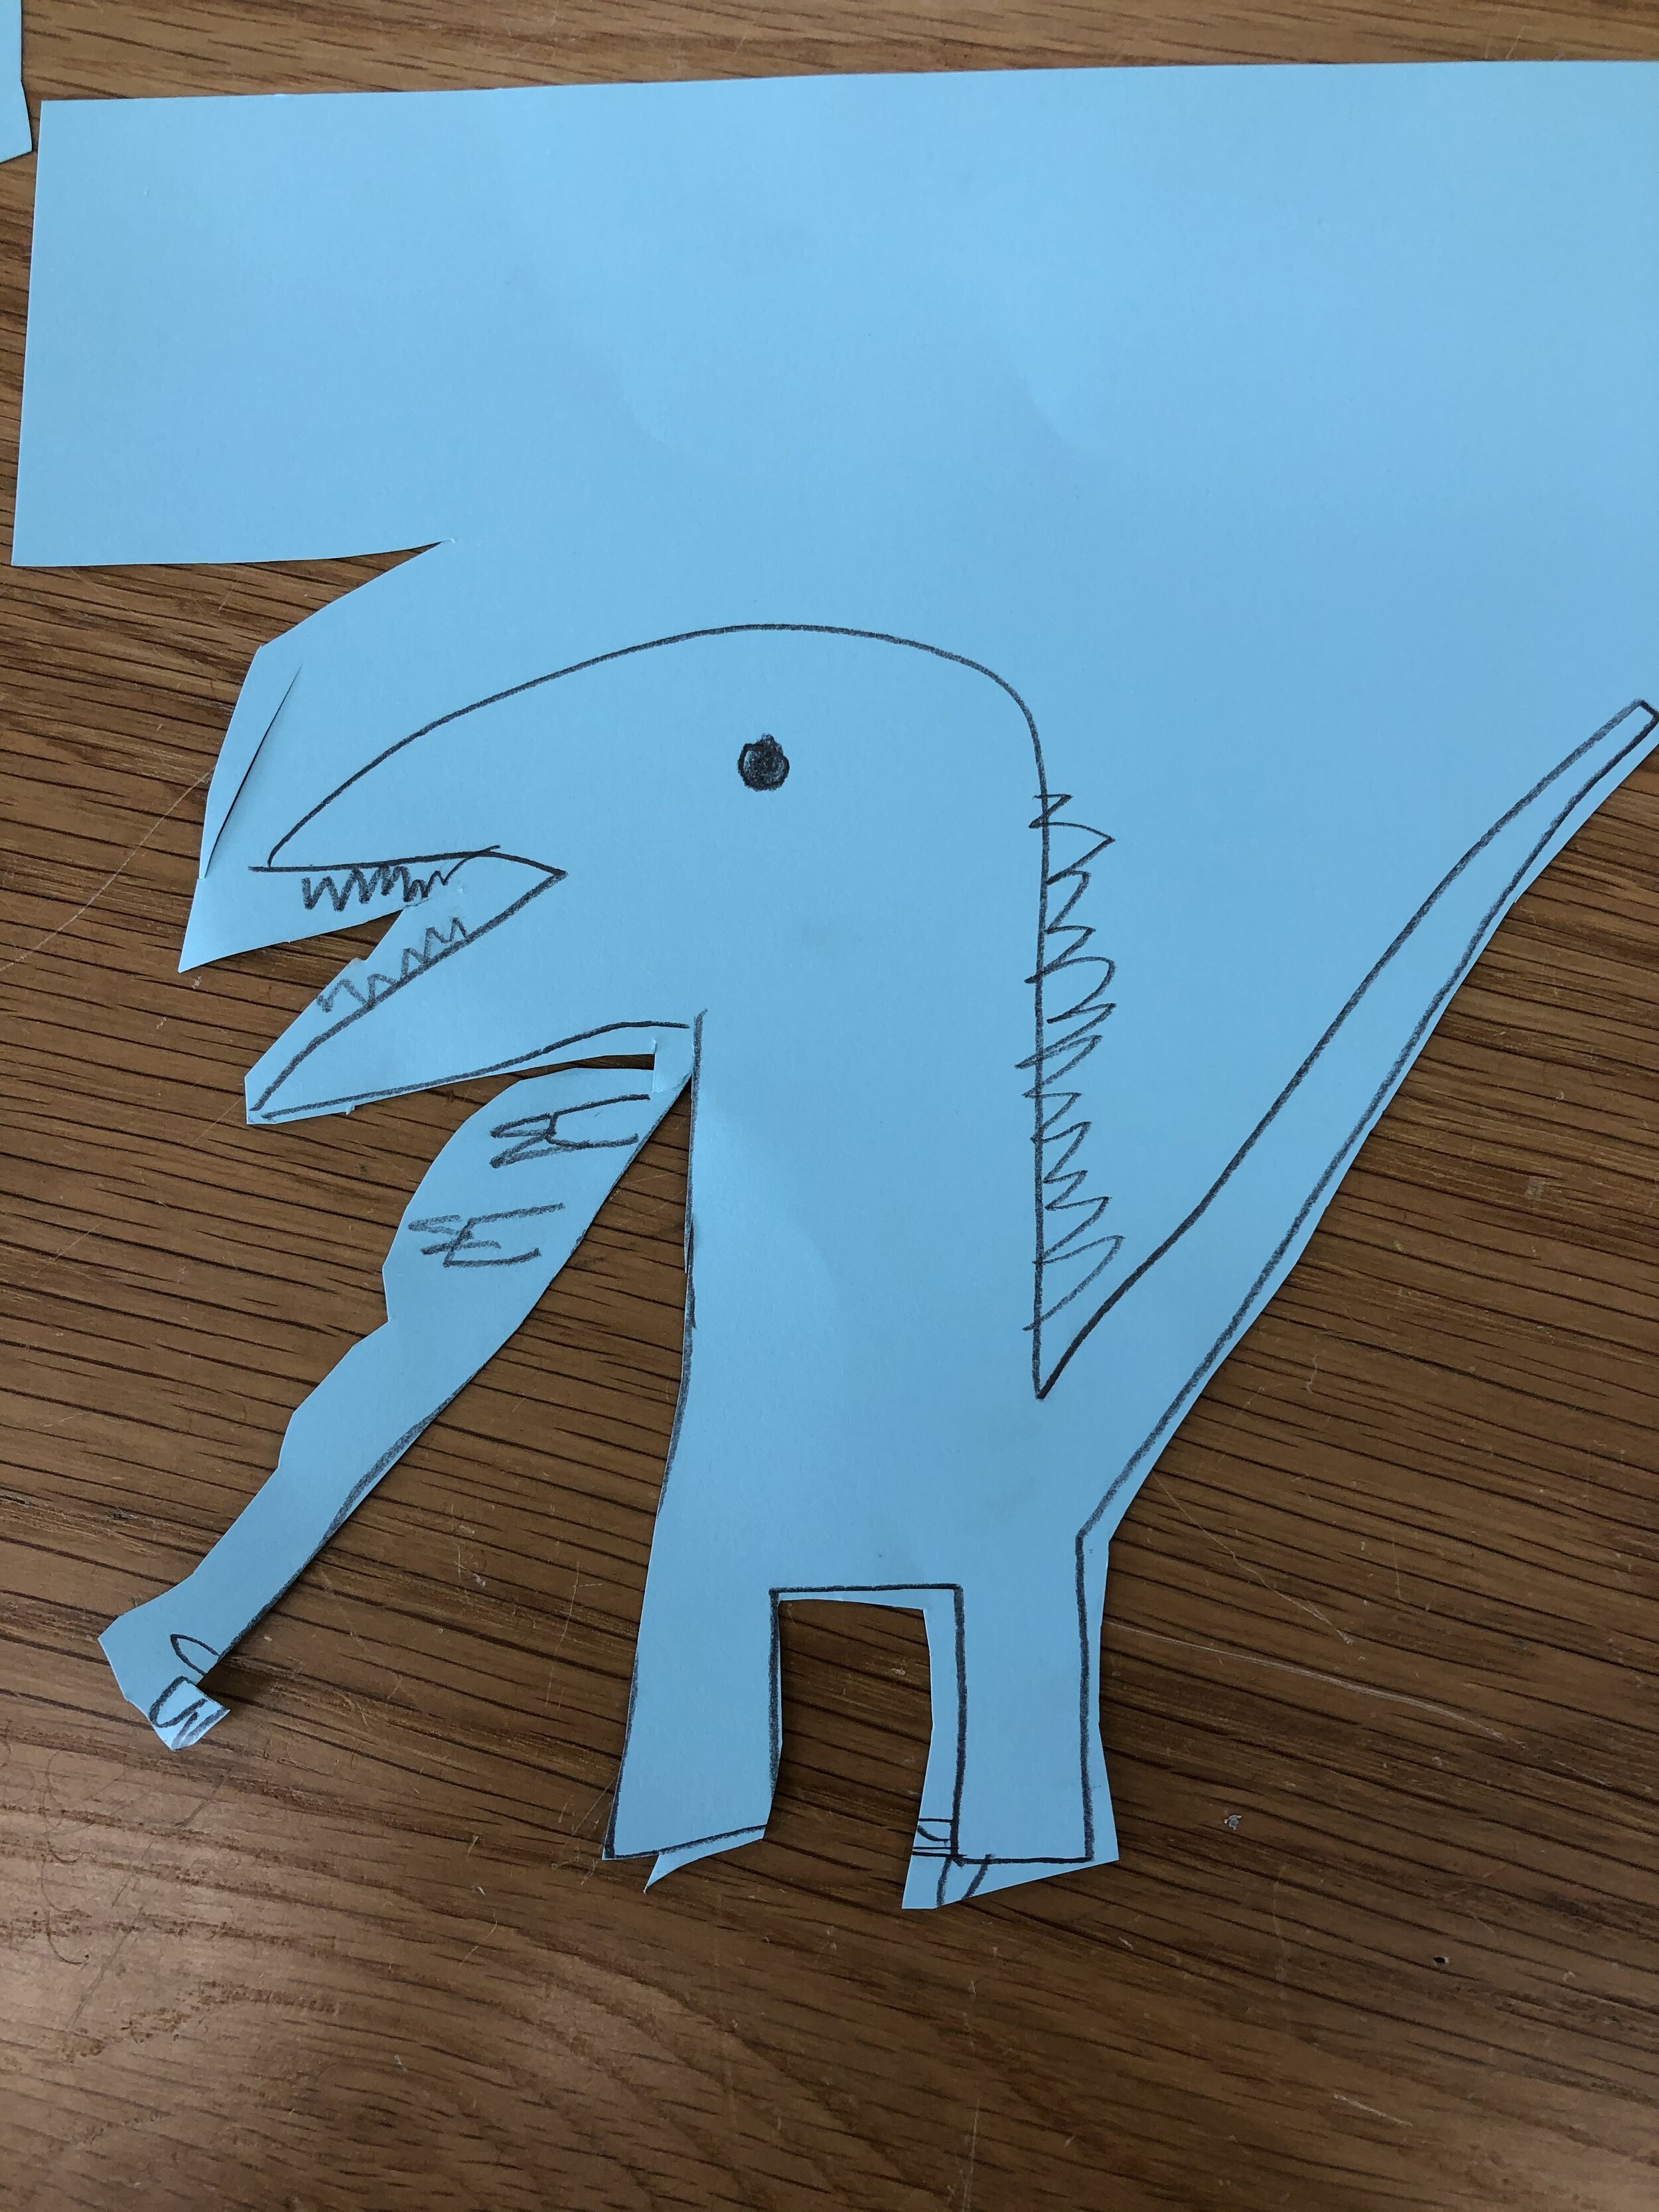
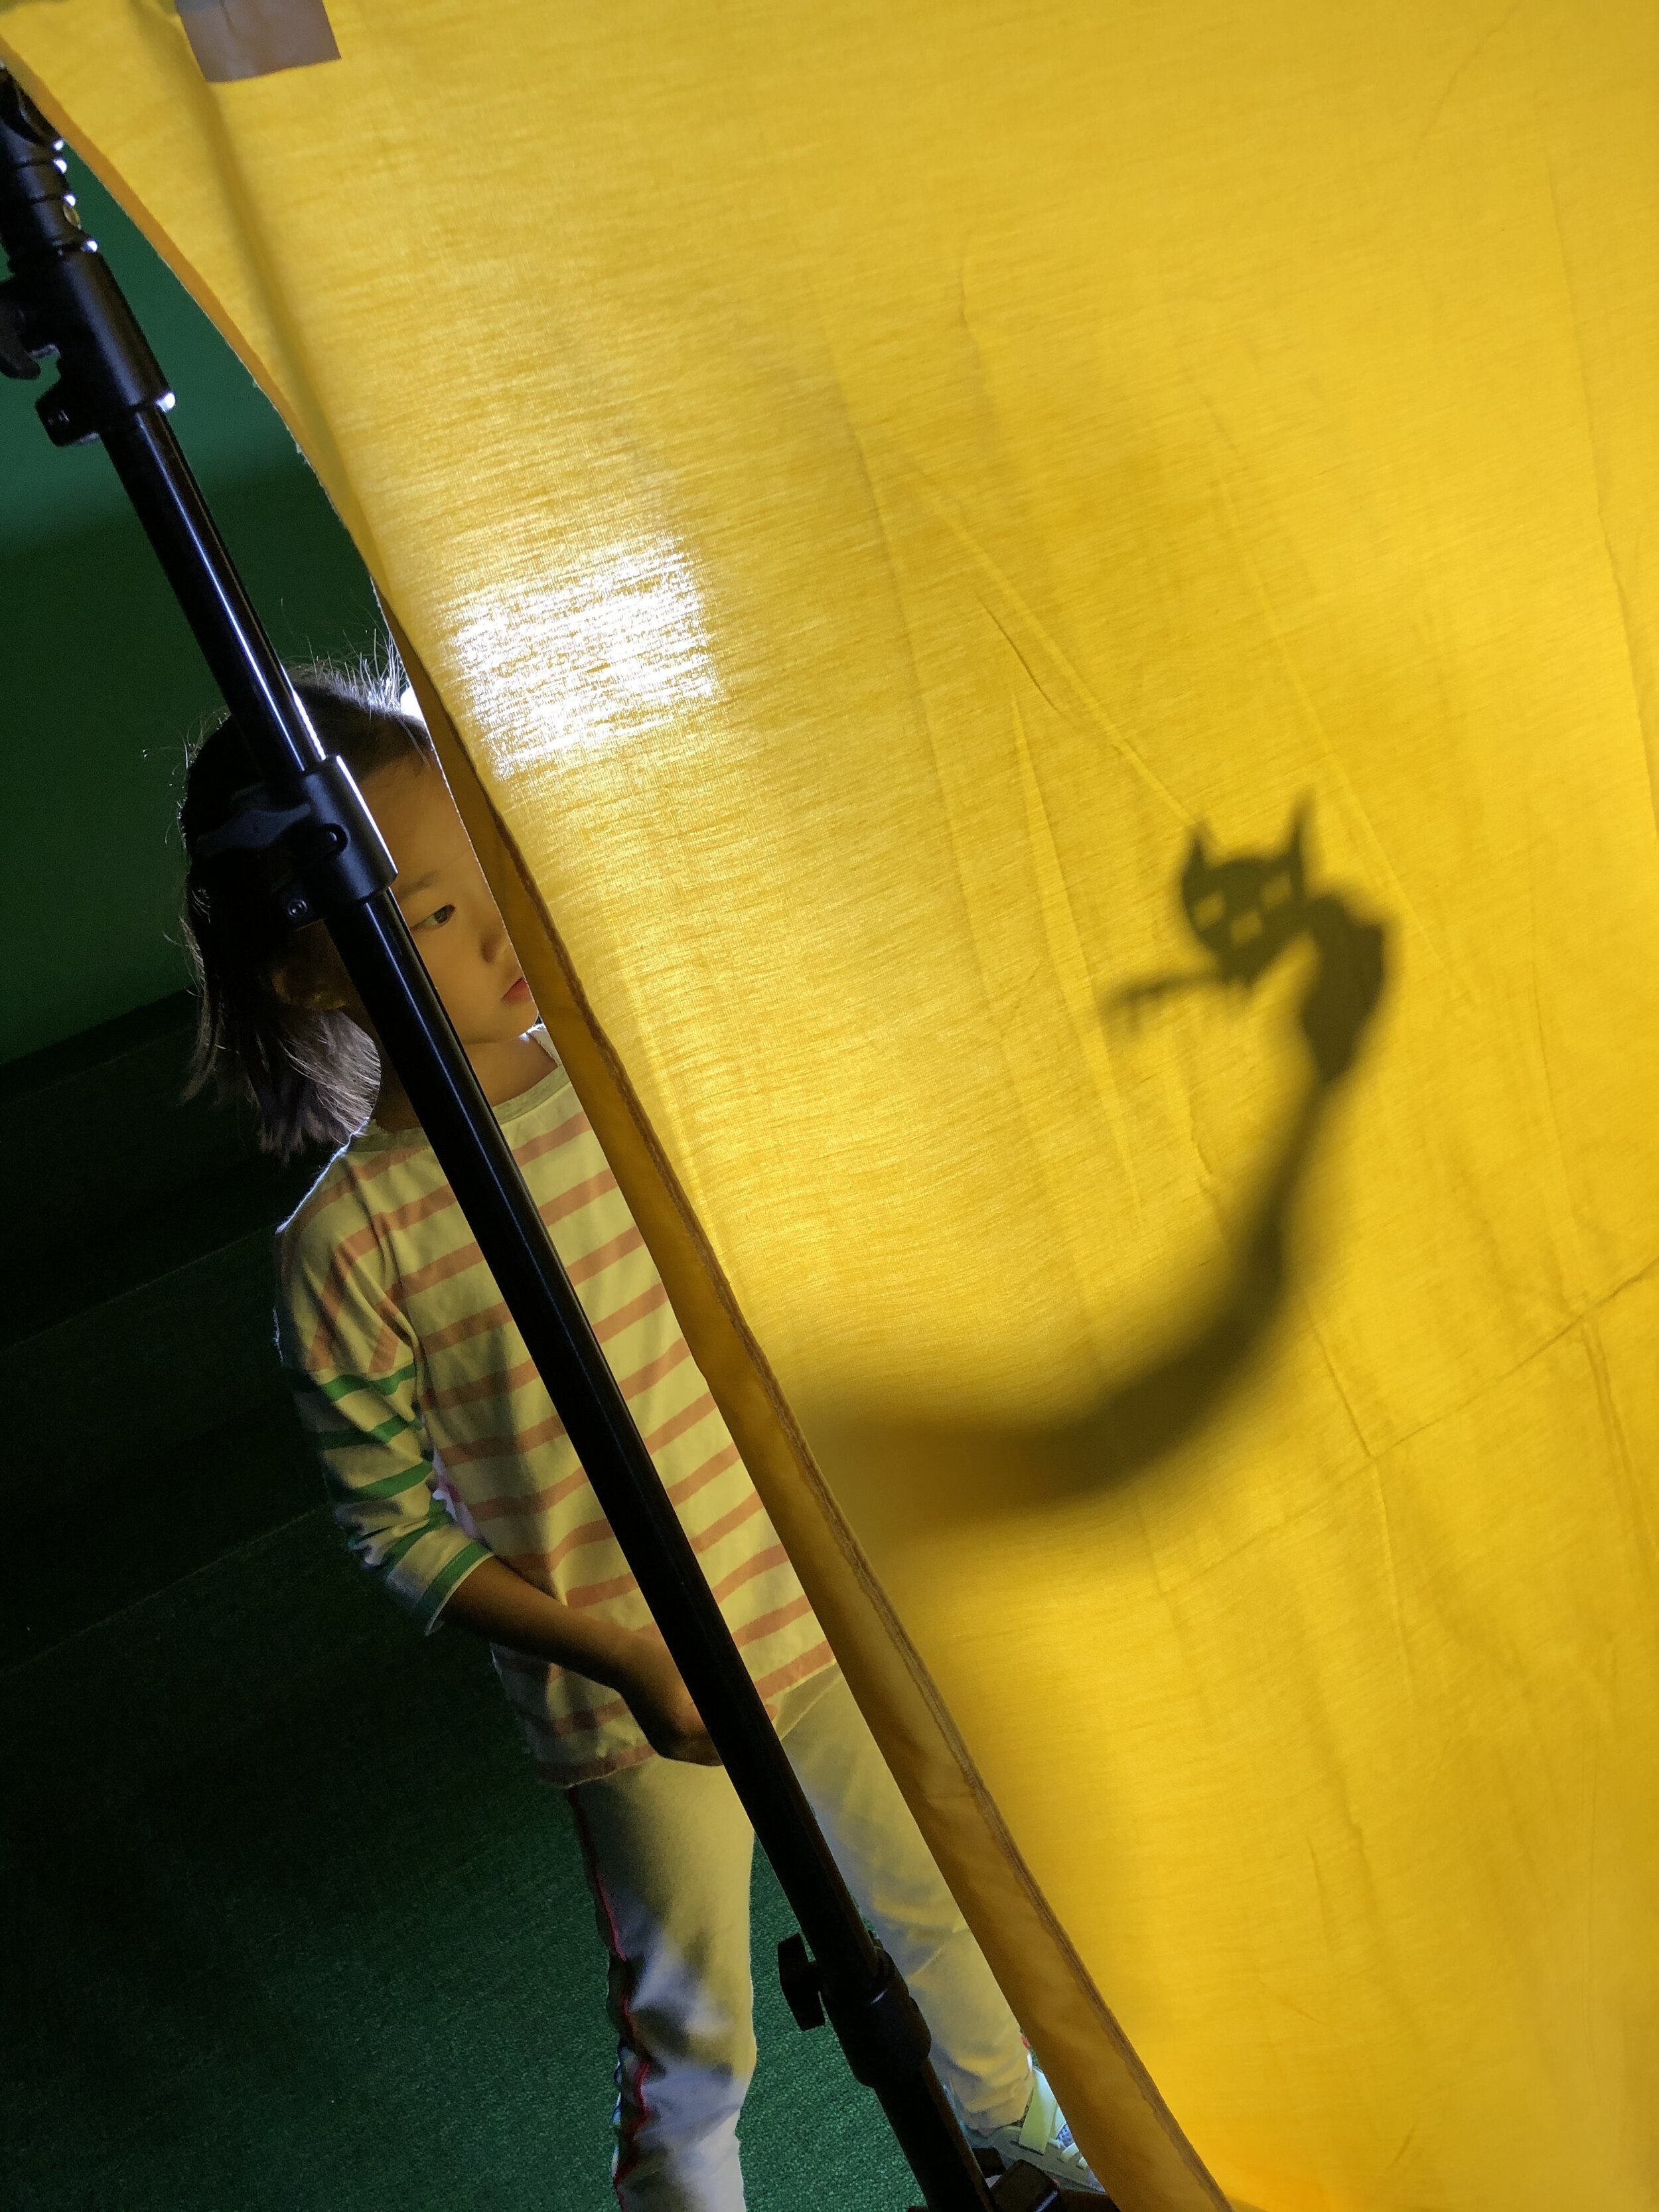
Once they were happy with their paper prototype, students were asked to trace their design onto Seesaw. The use of Apple Pencils was really helpful during this process because students could be more precise in their tracing. I also highlighted how we can change the thickness of the marker line and reminded students to stick one just ONE dark color.
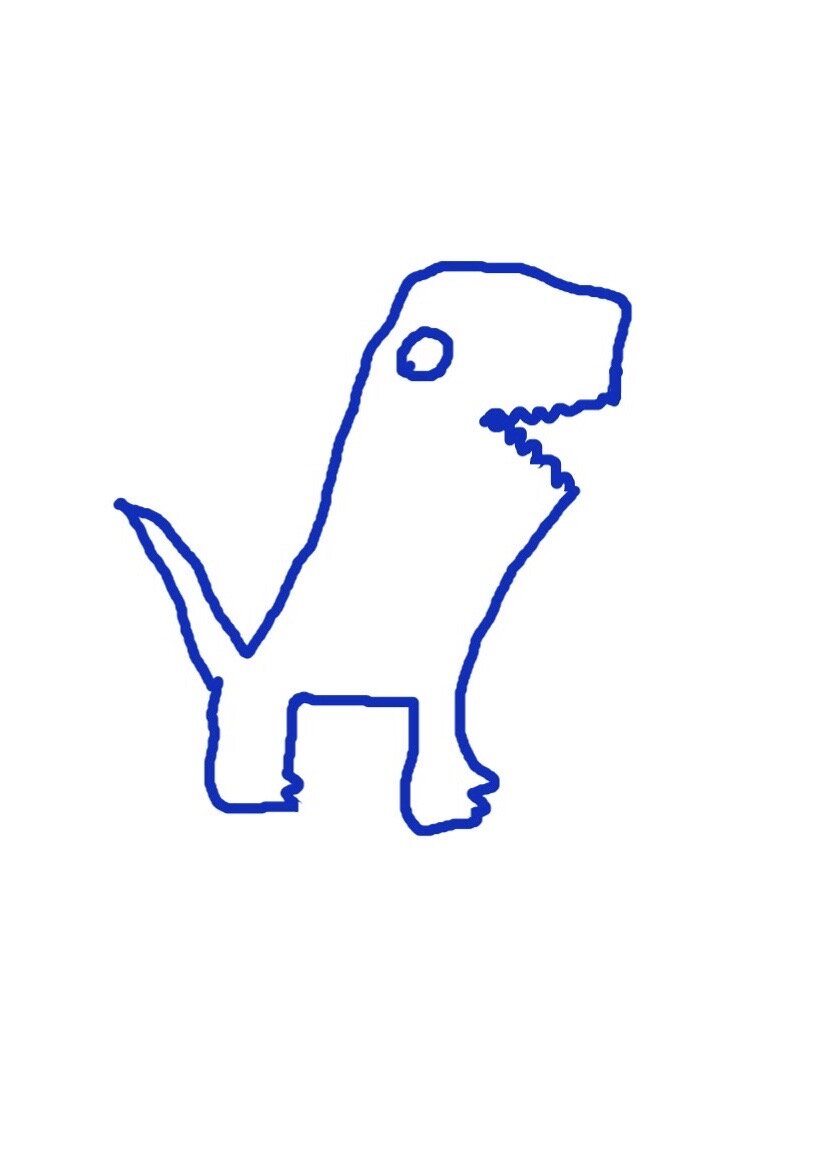
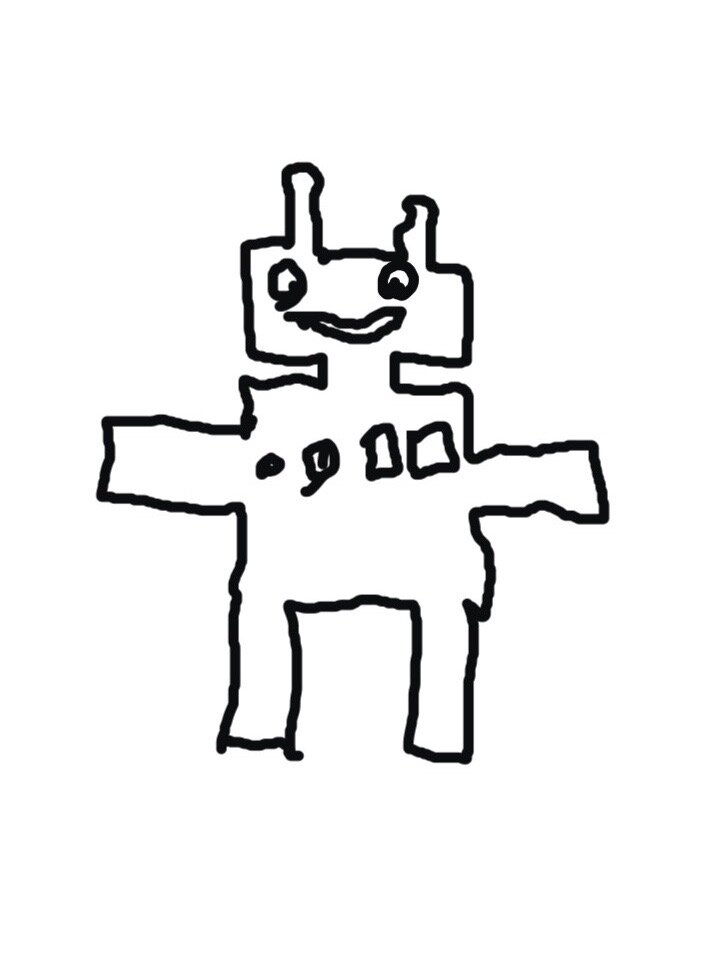
Here are some examples of the final product.
Moving Parts
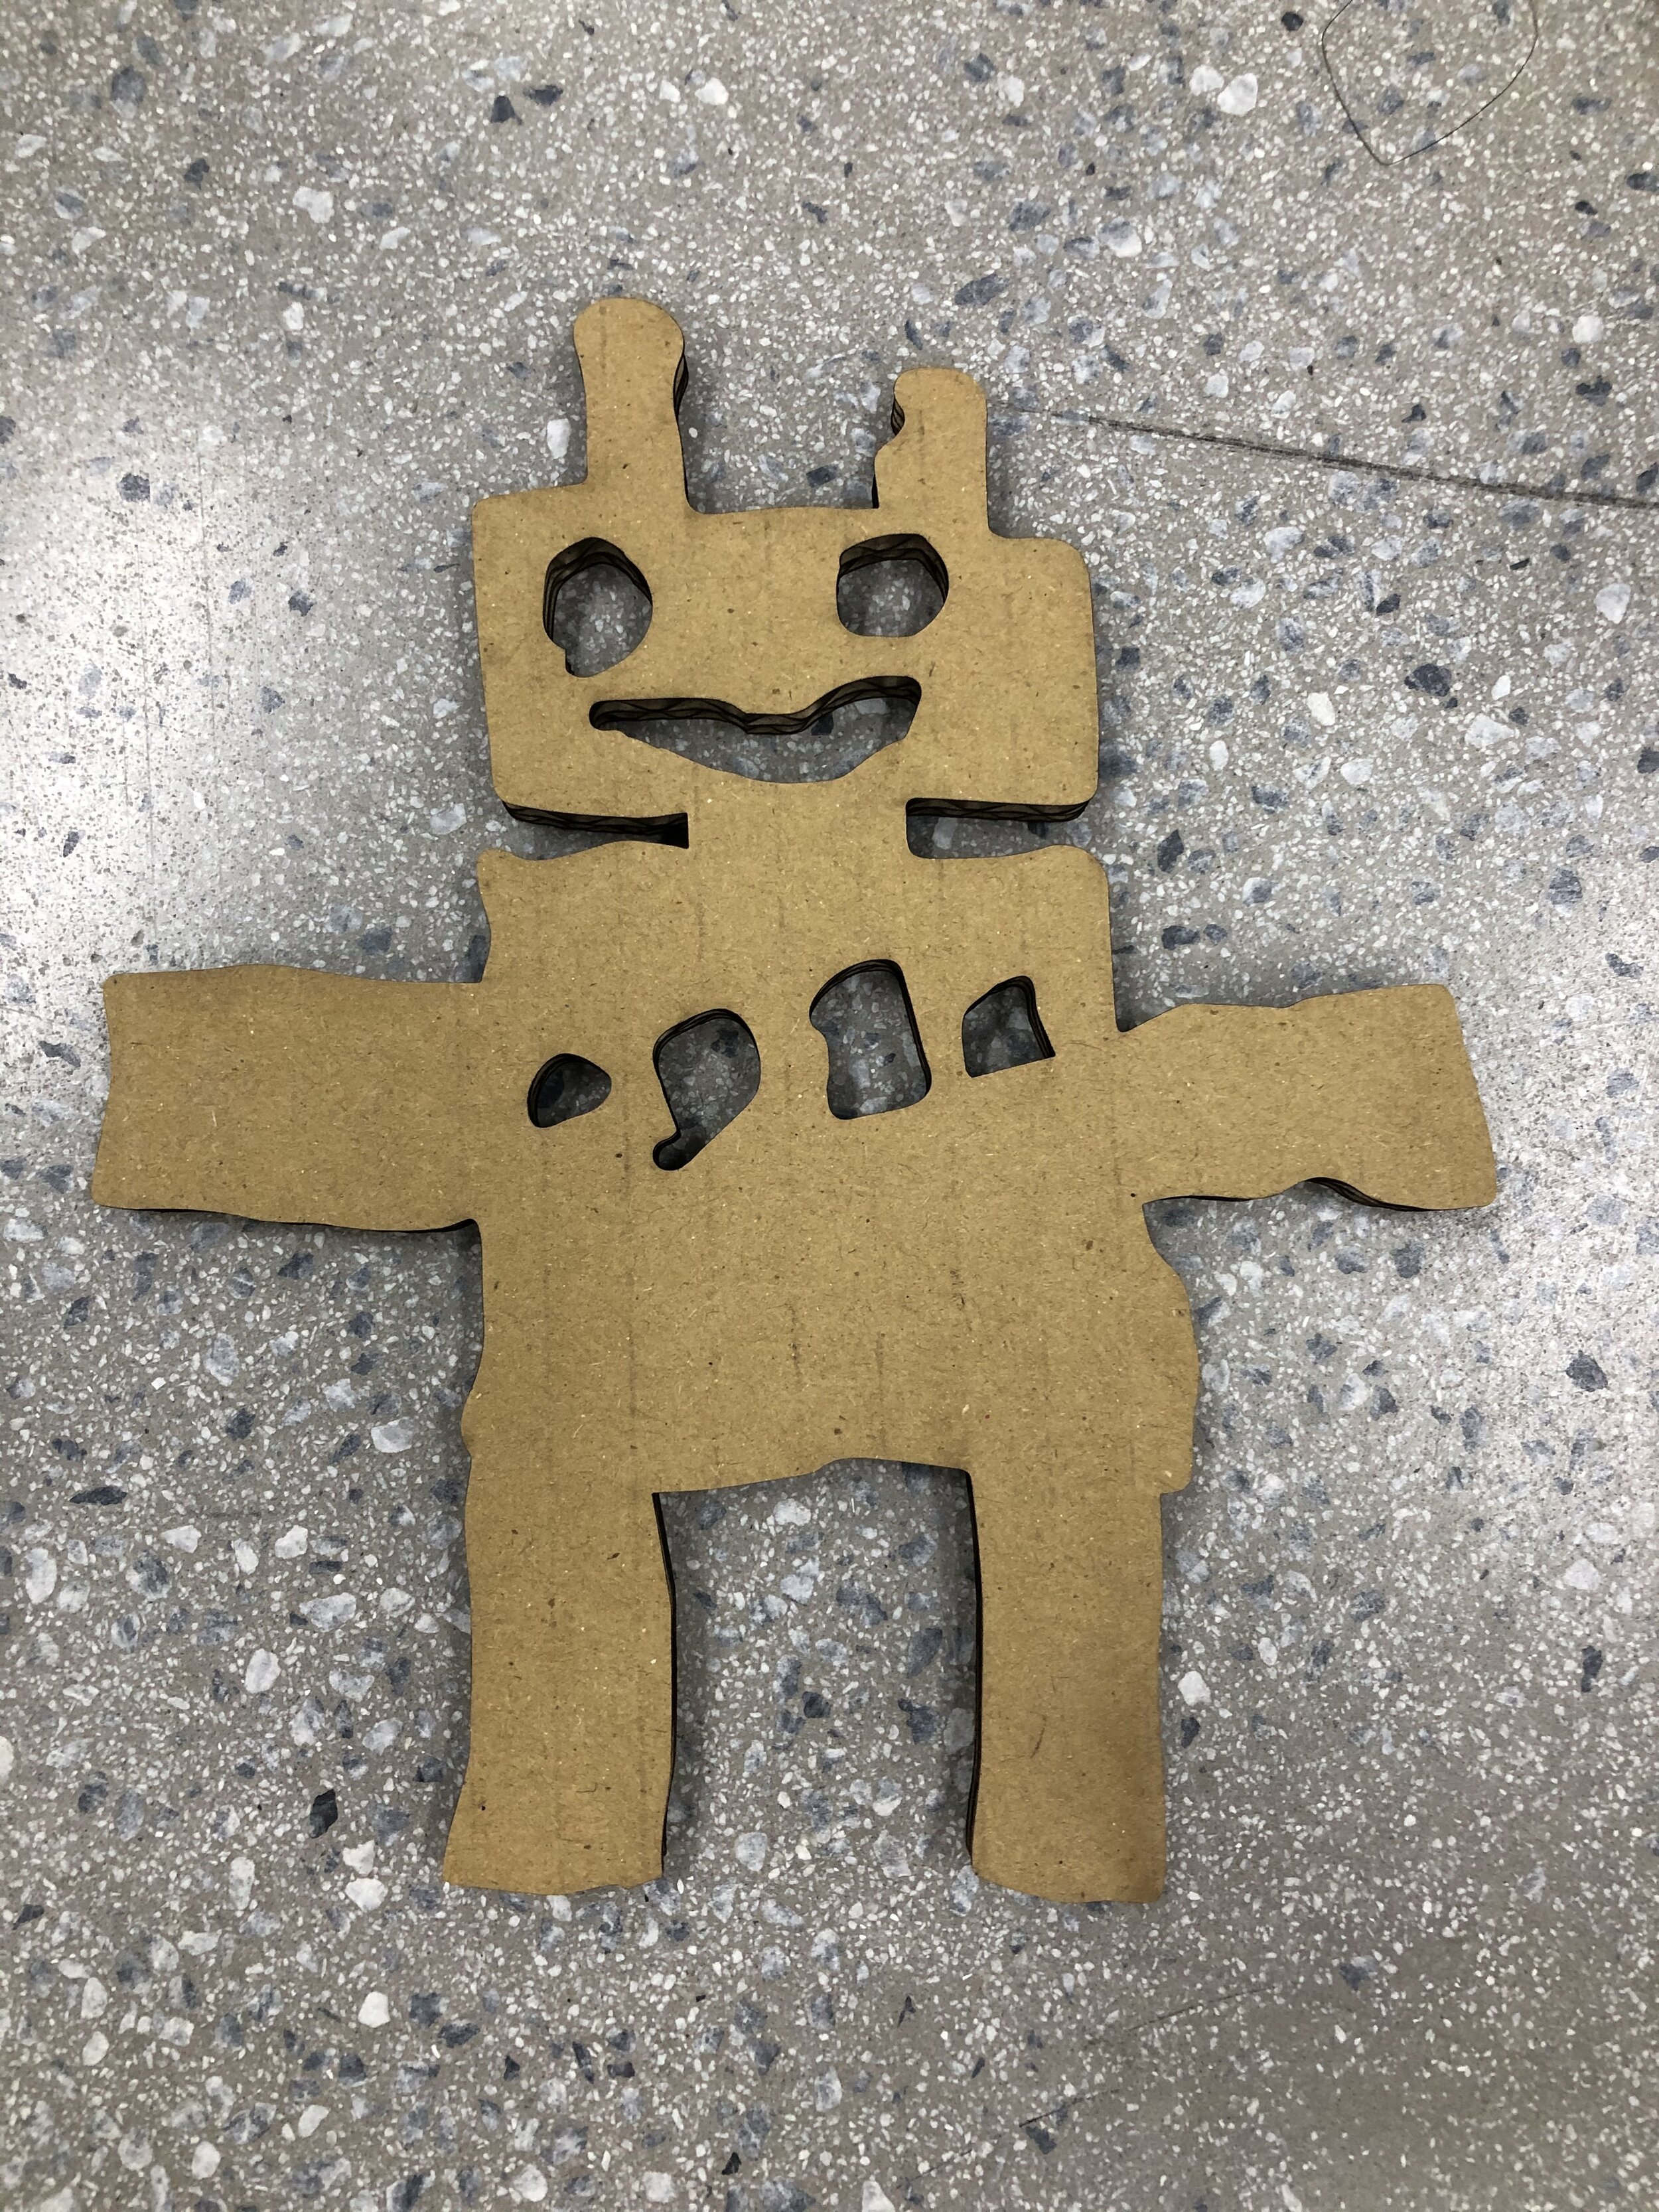
When I shared this project on Twitter, Jane Ross replied saying she was doing almost the exact same thing with her students! The difference was their focus was on designing shadow puppets with moving parts and how to draw their designs in separate pieces.
G1 have been busy designing and constructing laser cut moving puppets in our Makerspace. These were traced in Keynote on iPad with an Apple Pencil to get a clean line for the Laser cutter. #jisedu #makered #makerspace #everyonecancreate #lasercut pic.twitter.com/TRTO2YF6cP
— Jane Ross (@janeinjava) November 25, 2019
I LOVED this idea and decided to challenge my students to extend their thinking by designing a shadow puppet that had moving parts as well!
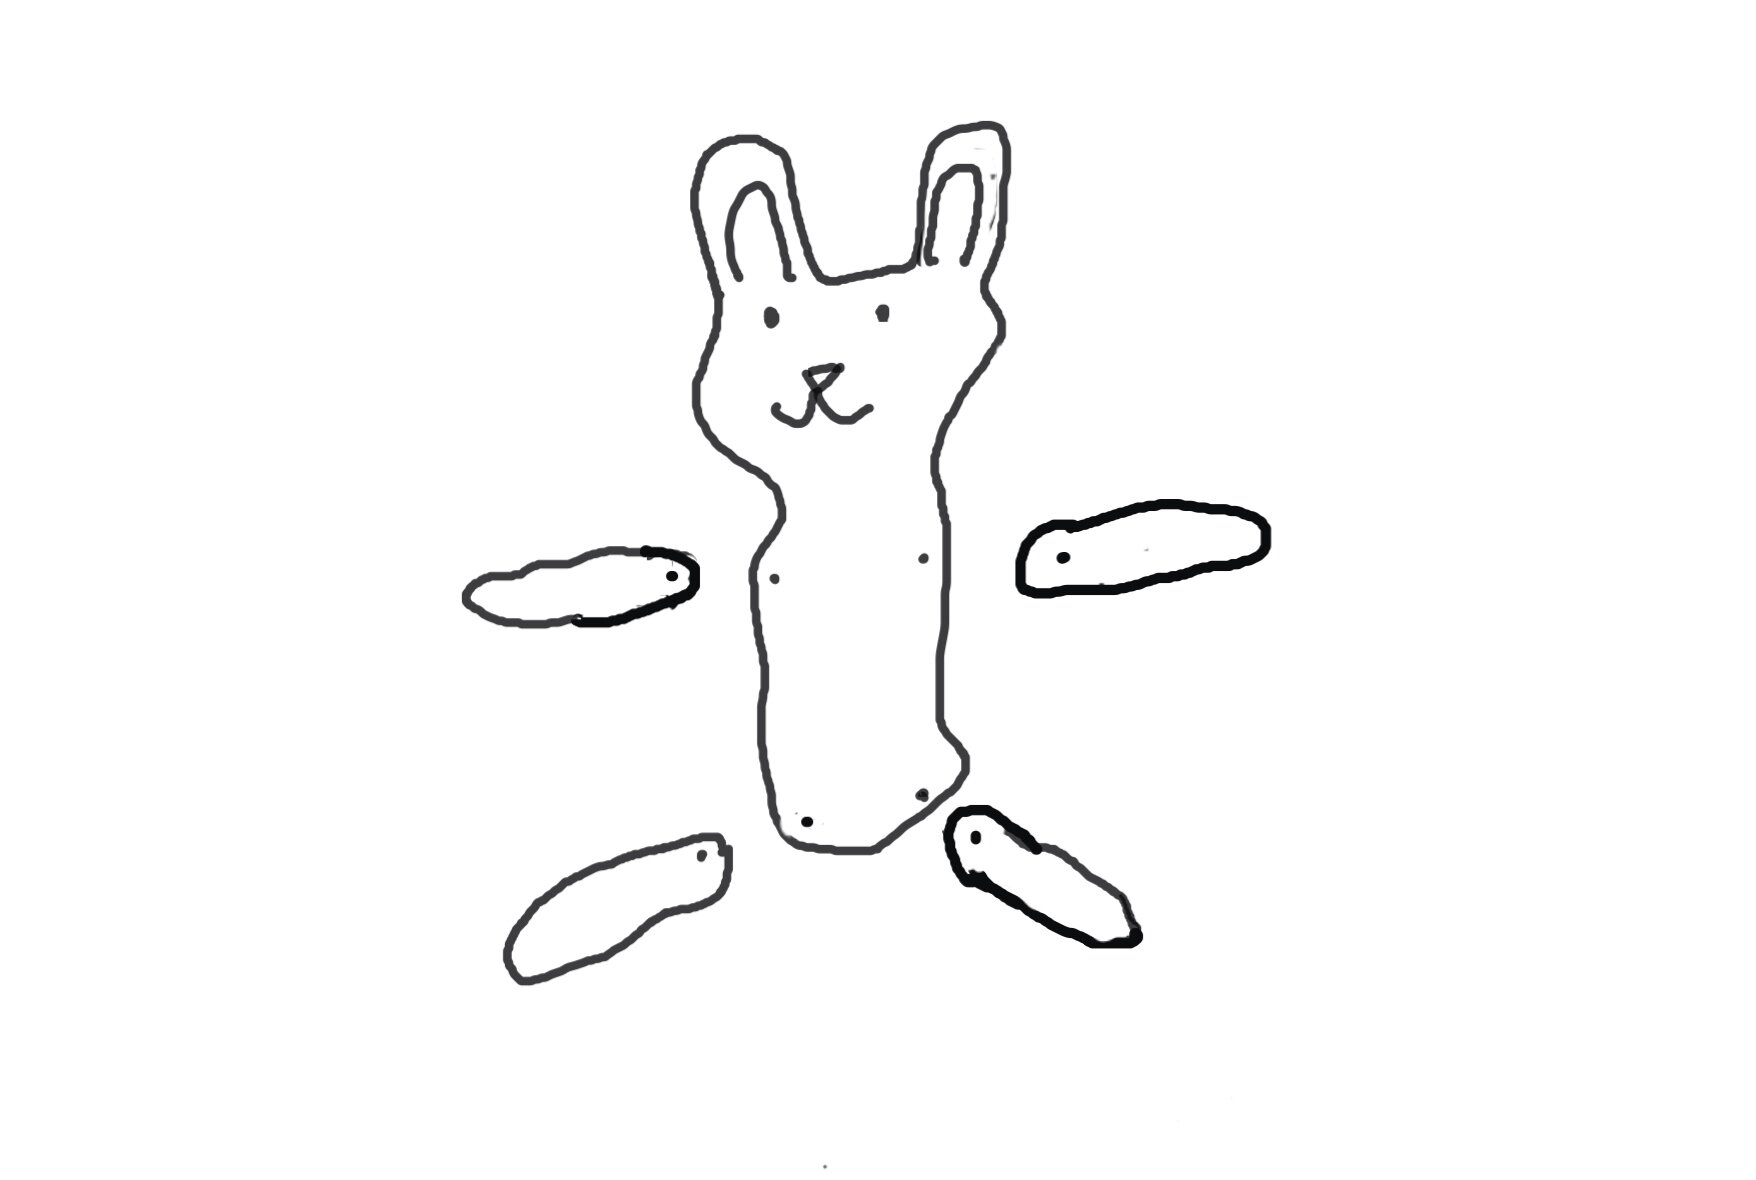
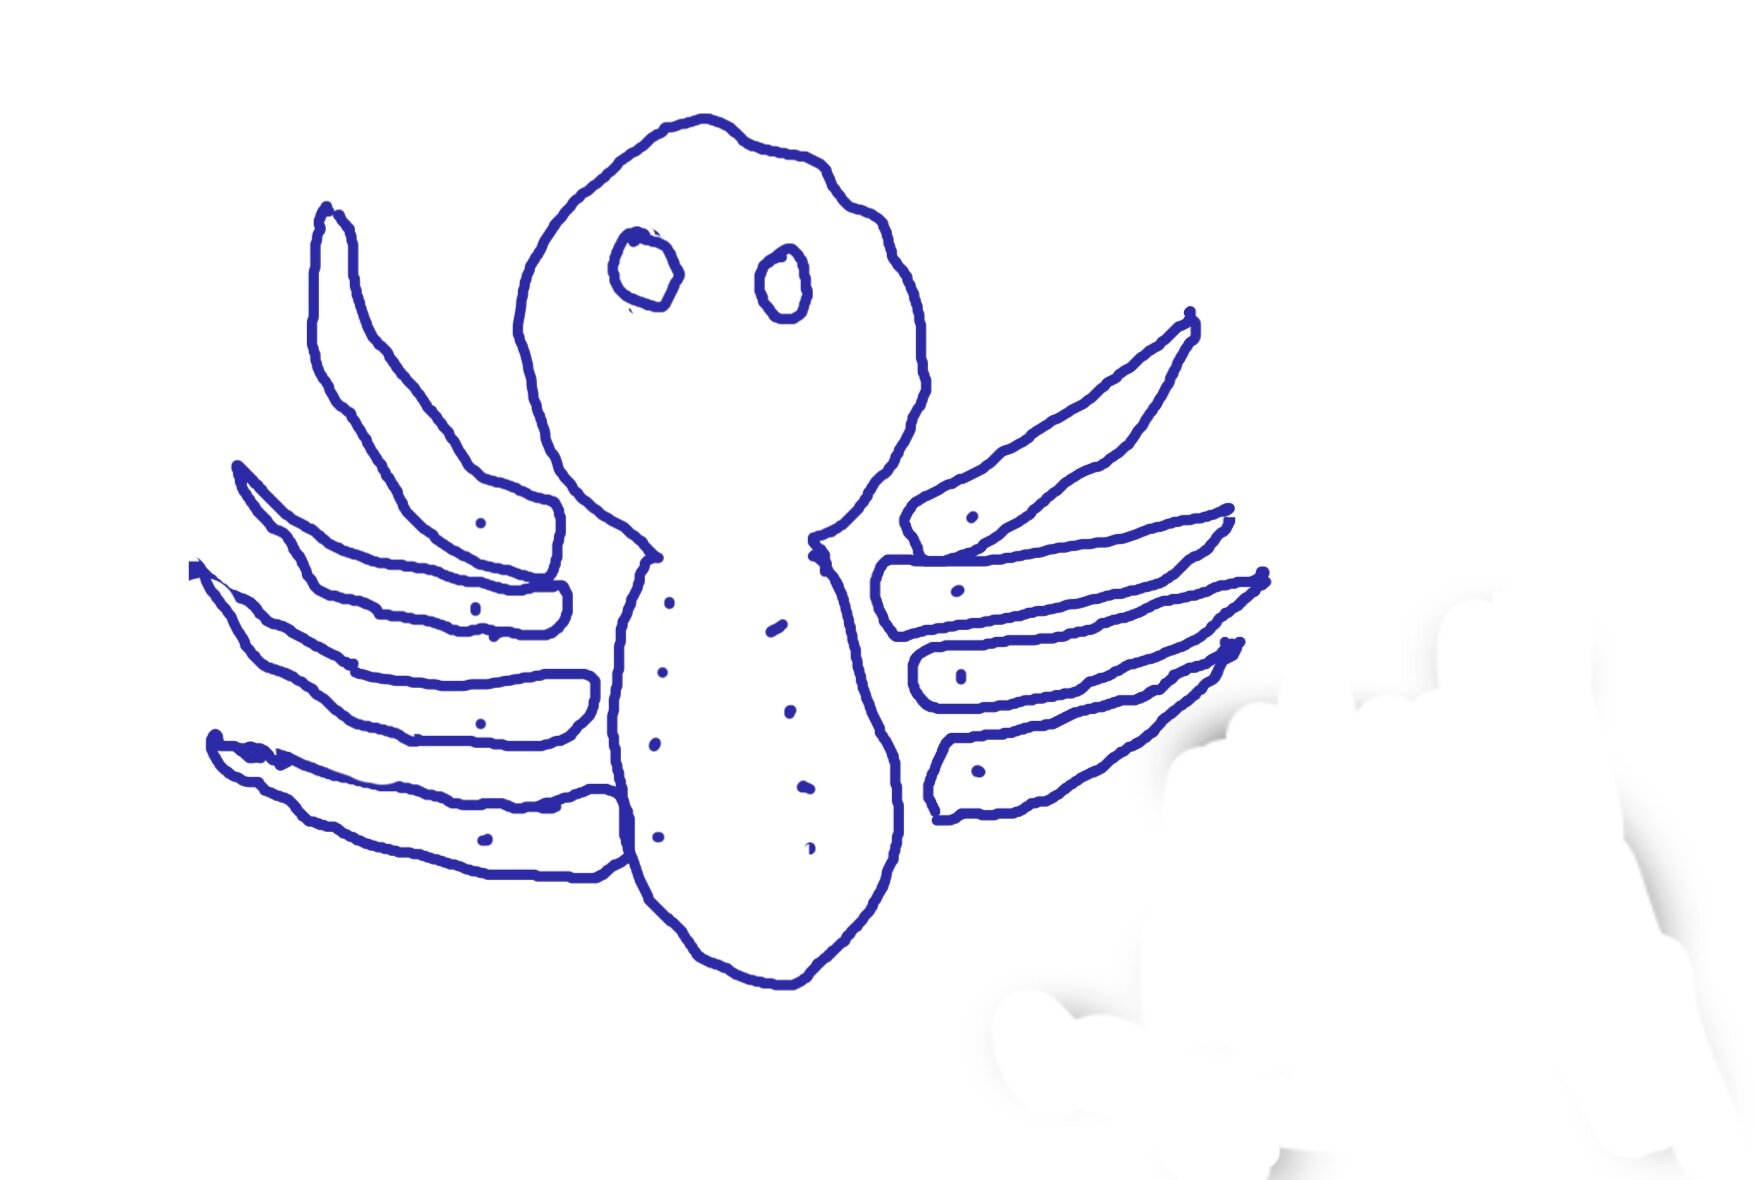
First, I showed the students my first shadow puppet next to a newer version of the shadow puppet with moving arms and legs. I asked them to turn-and-talk to notice some of the differences as well as how they thought I had drawn it differently to create a moving puppet.
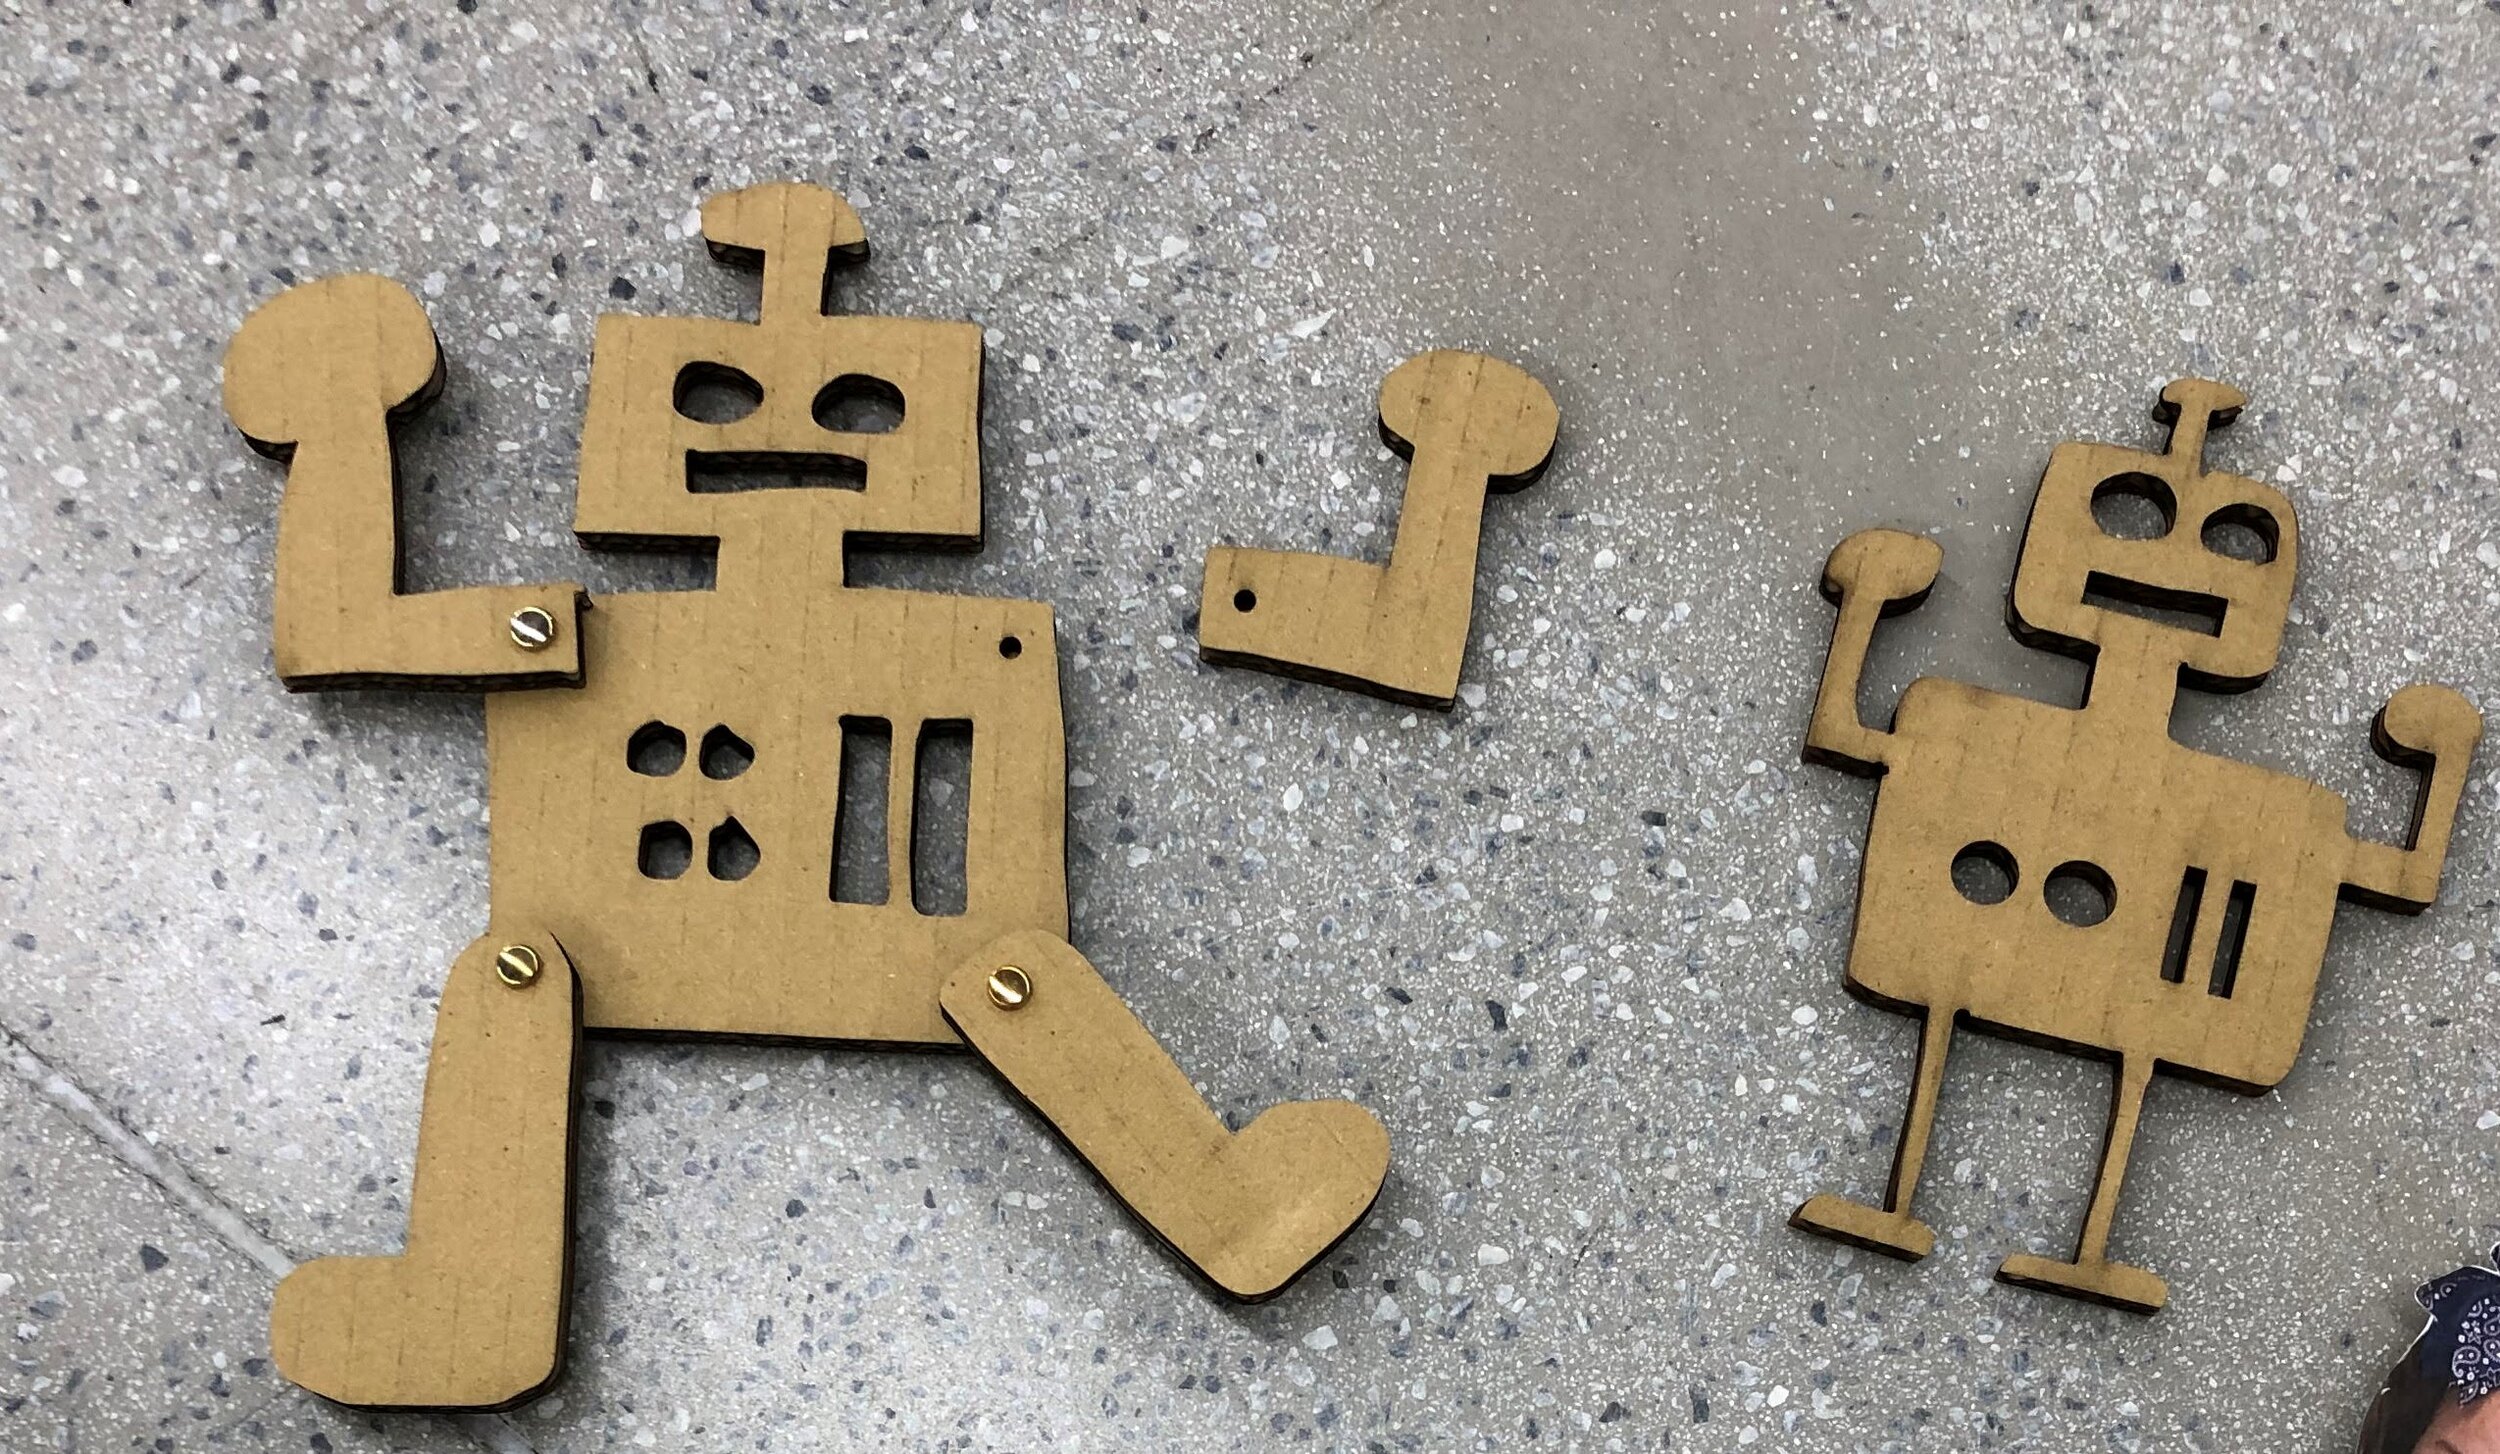
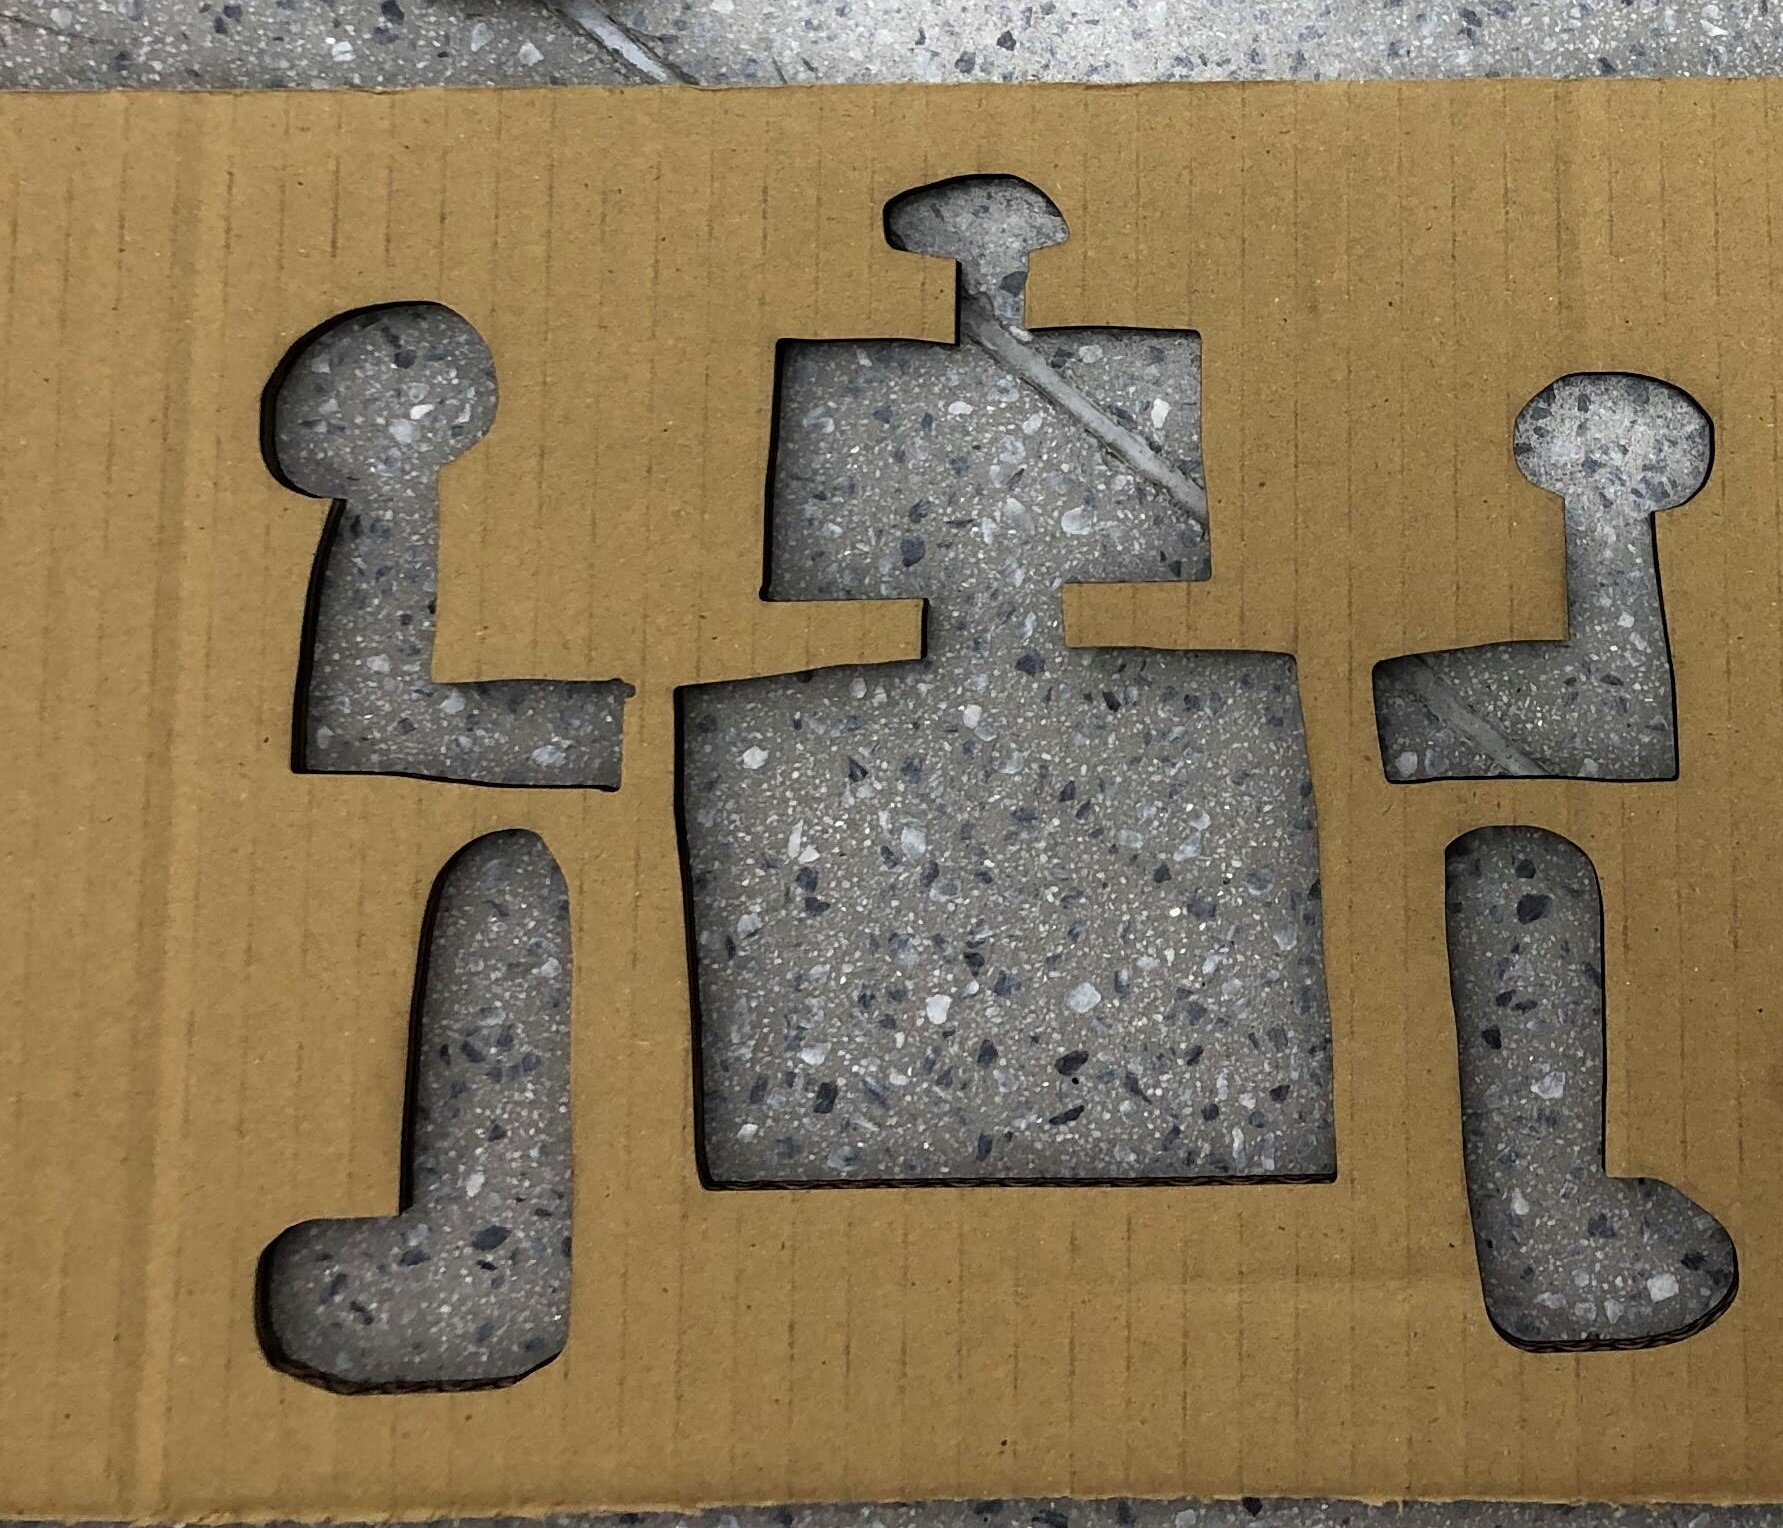
Many students picked up on how I drew the limbs fatter and that I had to create holes for connecting the parts together. I then showed them the process of prototyping on paper again. Most of the students remember this process well and did not make as many errors in terms of drawing lines that would create unwanted cuts. Here are a few of the final designs.

Play and Exploration
In their classrooms, they assembled their puppets and had some time to play with them as well, investigating further how their puppets worked using light and shadow.